In this post we’ll show you how to localize and translate a WordPress plugin into any language supported by WordPress.
When developing a plugin, it’s always good idea to make it translation ready as it could additionally reach audiences who do not use English as their first language. If you were wondering how important a translation option is, you can check the repository and see that every single popular plugin is available for language localization. You will find this option is available with UpdraftPlus, MetaSlider, WP-Optimize, Contact Form 7 and WooCommerce, as well as many more. These are some of the most popular plugins available and are coded in a way that allows anyone to translate them easily into their native language.
We’ll show you how to code a plugin so that it will be localized and translated into any supported WordPress language. For example, if we wanted to translate a plugin into French, the following steps will allow plugin translation and also make it ready for all supported WordPress languages.
How to Localize and Translate a WordPress Plugin
When creating a plugin, we should make sure that we load the plugin text domain. WordPress provides this function:
This code will load the plugin’s translated strings. It may seem a little confusing, but keep reading and we’ll explain how it works shortly.
First, let’s take a look at how to add this function to our plugin code. In your plugin folder, create a directory called ‘languages’. Next, add the below code to your plugin main file.
* Load plugin textdomain.
*/
function plugin_load_textdomain() {
load_plugin_textdomain( 'udp', false, basename( dirname( __FILE__ ) ) . '/languages/' );
}
add_action( 'init', 'plugin_load_textdomain' );
In the above code, we keep the first parameter (domain) as ‘udp’. We should keep this domain name as per our name of the plugin. The second parameter defaults to false. The third parameter is the path of our ‘languages’ directory. This code keeps our translation files ready on the WordPress initialization.
Use of __() and _e() Methods
As we are aiming to make our plugin available in all languages, we should wrap all our plugin text inside either:
__() or _e() functions.
It is very easy to use these methods. Both methods work exactly the same but there is a rule for using both.
In our plugin code, we normally have two types of text. The first is wrapped in HTML directly and the second is displayed using PHP echo function. Below are examples of both types:
Type 1
<h2>My Plugin Title</h2>Type 2
<?php echo 'My Plugin Settings'; ?>
The general rule is that if you are printing text using PHP echo then you should wrap text in the following code:
<code>__()</code>
If it is in HTML then use the code: <code>_e()</code>.
The above code should be written in the following way:
<h2><?php _e('My Plugin Title', 'udp'); ?></h2>
and
<?php echo __('My Plugin Settings', 'udp'); ?>
As can be seen in the above examples, the second parameter was written as ‘udp’, which is our plugin text domain. By using this domain, it will allow us to later translate our text into any language. This is how other plugins make their plugins translation ready.
If you wish, you can check our plugin:
If you search for the text domain ‘updraftplus’, you will see how our plugin’s text is wrapped inside __() and _e() functions.
Create a Sample Plugin
The next stage is to create a sample plugin with the some text so we can test our translations. First, create an ‘udp’ folder in your plugin directory. Inside this folder create the file: udp.php and the folder languages. Next, add the below code to the plugin file.
udp.php
<?php
/*
Plugin Name: UDP
Description: This is a sample plugin to test for plugin text domain
Author: Editorial Staff
Version: 1.0
License: GPLv3 or later
Text Domain: udp
Domain Path: /languages
*/

if (!defined('ABSPATH')) die('No direct access allowed');/**
* Load plugin textdomain.
*/
function udp_load_textdomain() {
load_plugin_textdomain( 'udp', false, basename( dirname( __FILE__ ) ) . '/languages/' );
}
add_action( 'init', 'udp_load_textdomain' );

function udp_menu_page() {
add_menu_page(
__( 'UDP Setting Page', 'udp' ),
__( 'UDP Setting Page', 'udp' ),
'manage_options',
'udp_setting_page',
'udp_setting_page',
'',
6
);
}
add_action('admin_menu', 'udp_menu_page');

function udp_setting_page() {
?>
<h2><?php _e('My Plugin Title', 'udp'); ?></h2>
<?php
}
Create the Translation Files
To generate our translation files, we will use the following translation editor software:
Translation files (.po and .mo) contain the string to translate and the translated string. While creating the .po file we need to save it in ‘{domain}-language code’ format. In this example, the file will be udp-fr_FR.po.
Next, install the POEDIT software on your system. This software is available for all platforms and can be installed on Windows, Linux or Mac.
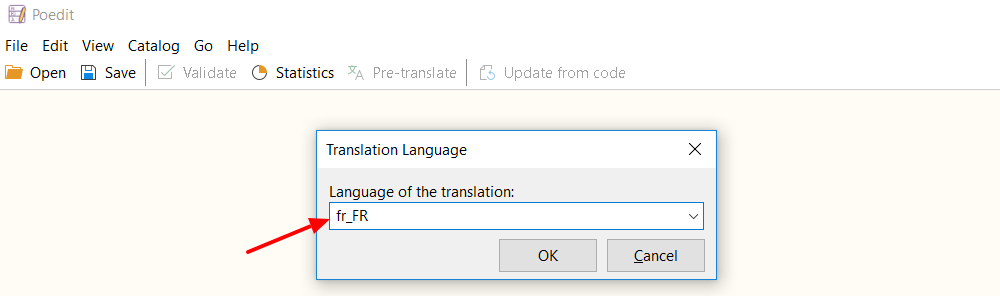
Once installed, open POEDIT and go to File->New, where we will enter our language code in the window prompt.
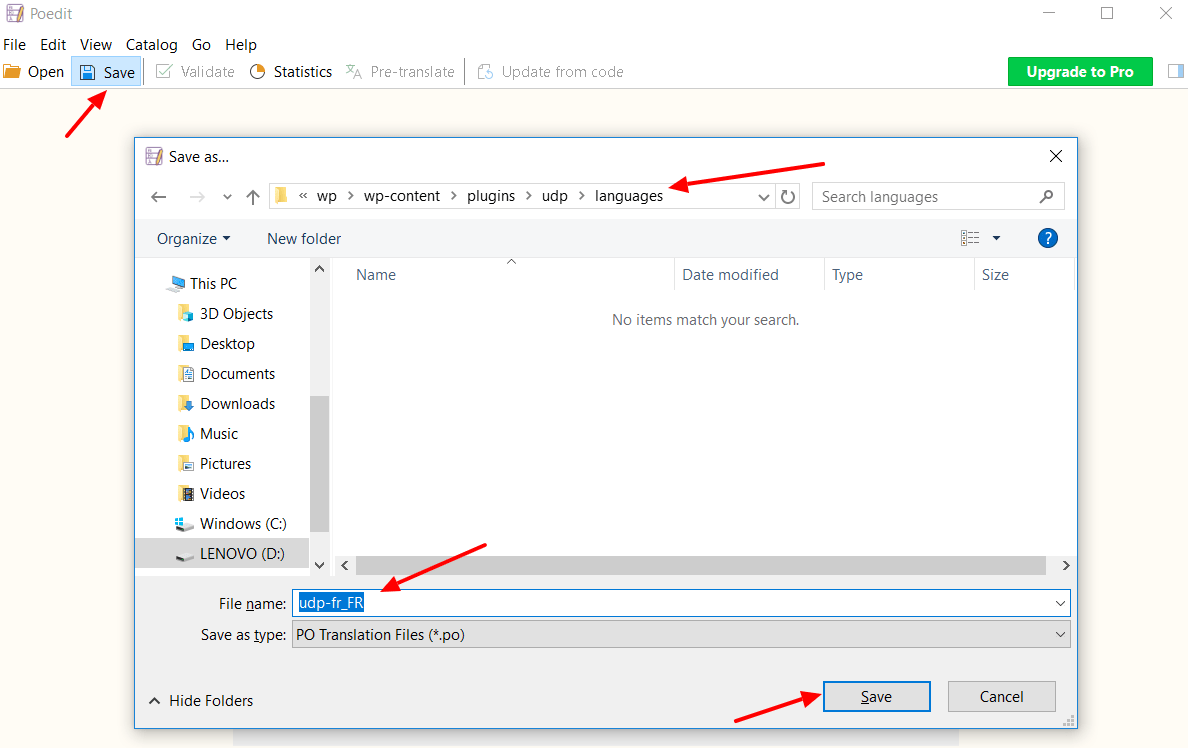
Click on the ‘Save’ icon, after which, the file explorer will open. Head over to the plugins languages directory and save it as the following: udp-fr_FR.po.
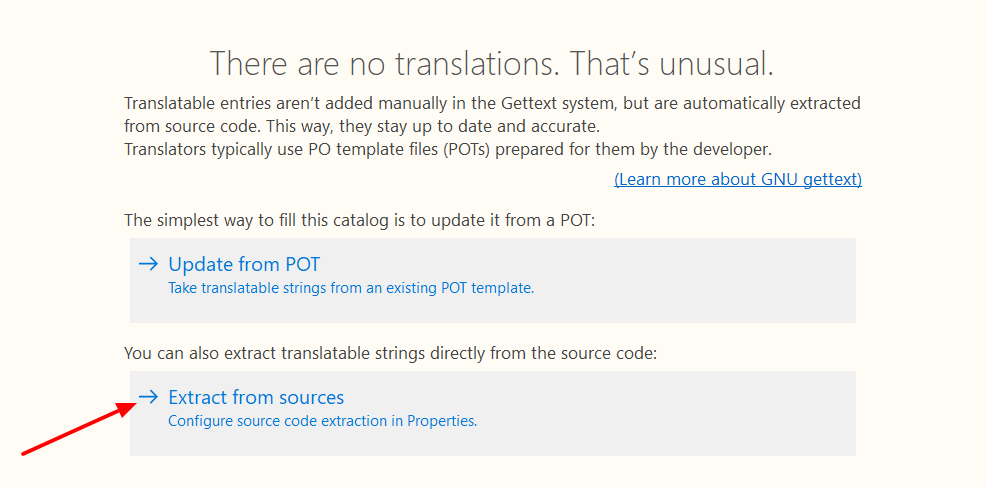
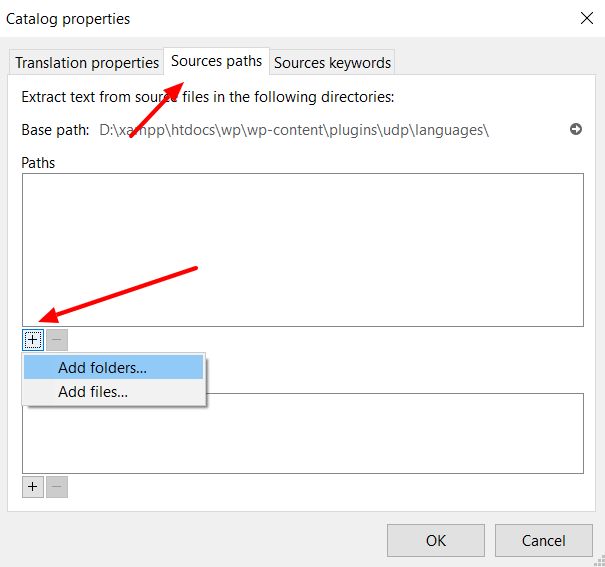
Now we are able to add the French translation for our plugin text. To do so, click on the ‘Extract from sources’ section.
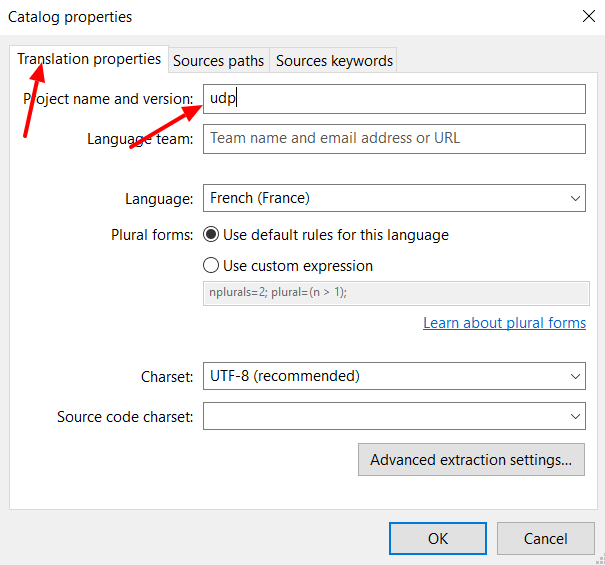
This will open a catalog properties popup. We now need to configure the three following tabs: Translation Properties, Source Paths and Source Keywords. In the Translation Properties tab, add our domain ‘udp’ as the project name. Source Paths will be our plugin folder and we will add ‘__ and _e’ inside Source Keywords.
If you have multiple folders inside the plugin, then we will need to choose each directory individually.
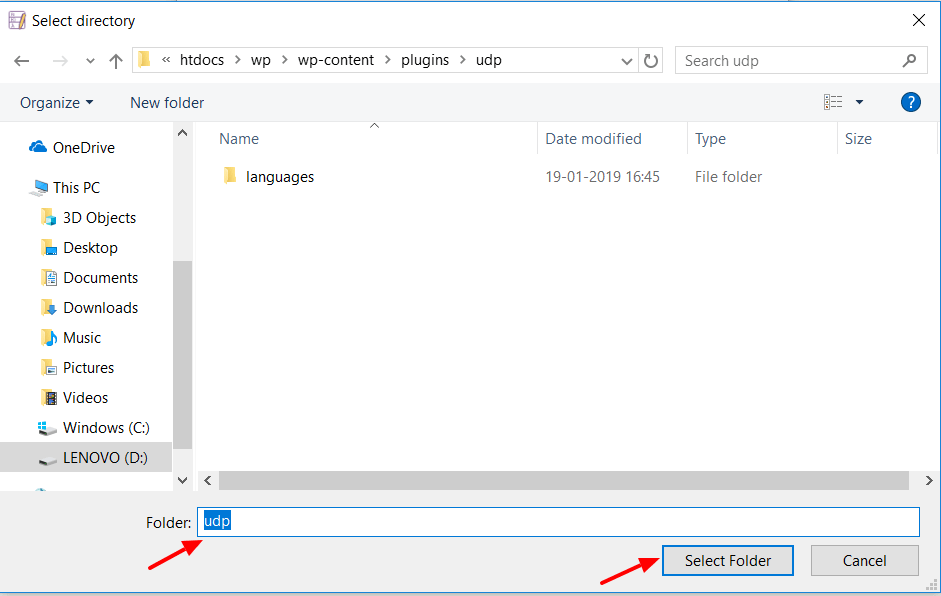
After selecting the plugin folder you should see ‘.’ in the Paths section. Repeat the same process for other folders inside your plugin directory if necessary.
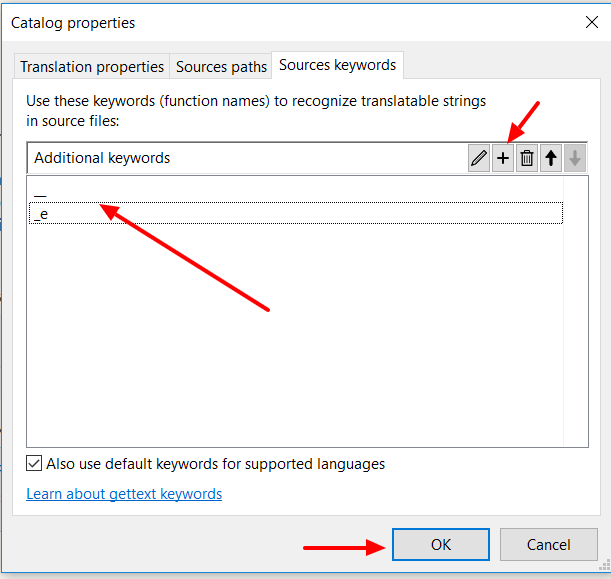
Under the Source Keywords, click on the + icon and add ‘__’ and ‘_e’ as a keyword and click the OK button.
In the next window, under Source text, you will have all strings available to translate from your plugin. Choose the string one by one and add your French translation to the string.
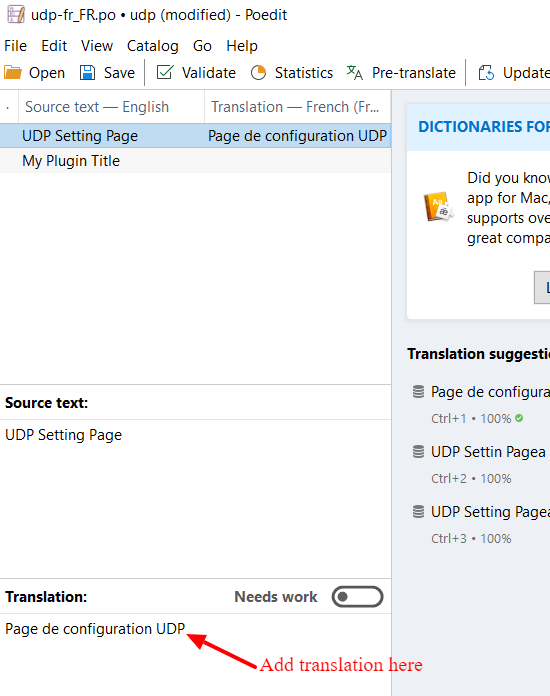
Once you add all translations, click on the Save icon. This will automatically save all your string translation in your udp-ft_FR.po file. Your .po file will now contain the following code:
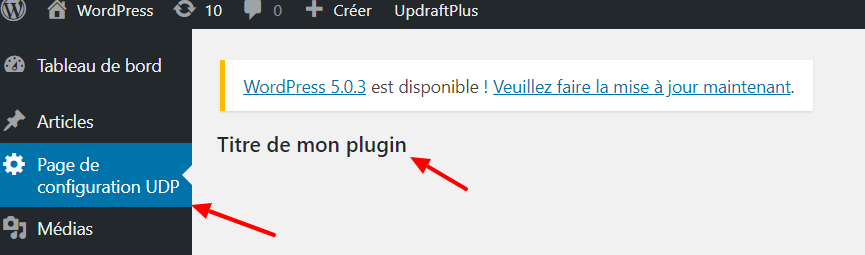
#: udp.php:24 udp.php:25
msgid "UDP Setting Page"
msgstr "Page de configuration UDP"

#: udp.php:37
msgid "My Plugin Title"
msgstr "Titre de mon plugin"
Test Our Plugin Translation
We have now completed the task of creating .po and .mo files for our plugin. Now it’s time to test our plugin and check the French language translation.
First, download our language file from the following address:
WordPress Language repository.
For the French language, the path is as follows:
French WordPress Language repository.
fr_FR.mo and fr_FR.po
Download files from this link and store it in the wp-content/languages directory. Create the ‘languages’ folder, if it does not already exist.
Next, we need to change the default language of our WordPress installation. Open the wp-config.php file and add the language as follows:
define('WPLANG', 'fr_FR');
Now if you go to the dashboard, your plugin should be displaying in the French language.
In conclusion
Creating a localized translation for your WordPress plugin can seem a little daunting and complicated at first. However the potential benefits of offering large non English speaking countries like Brazil, France and Germany your plugin in their native language can help open your plugin up to a whole new, appreciative audience. While it may seem like a lot of work, the rewards could be considerable.
![]()
![]()
![]()