How to install UpdraftPlus Premium
To install UpdraftPlus Premium or any of the add-ons (with the exception of UpdraftCentral, UpdraftVault and UpdraftClone) please read the below or watch the video (noting you don’t need to visit the URL as is stated in the video. We’re working hard to improve and update content across this website and will get to this as soon we we can).
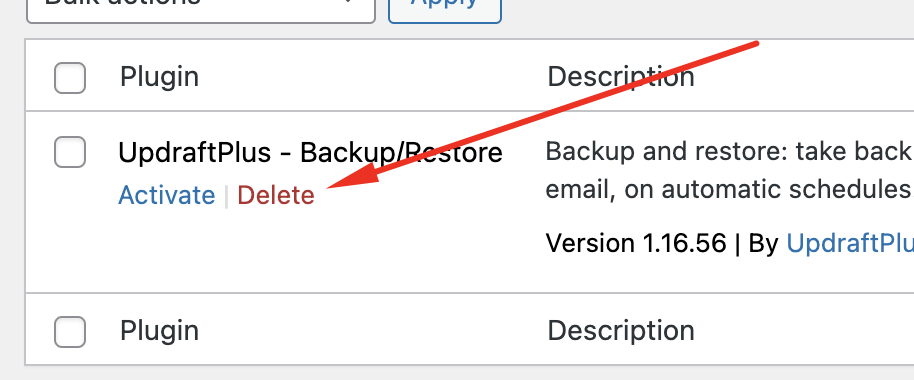
1. Uninstall the free version of UpdraftPlus (if you have it)
- Click ‘Plugins’ in the WordPress menu.
- Find UpdraftPlus. Click ‘Deactivate’ then ‘Delete’.

2. Download your purchase
If you’ve purchased an add-on or UpdraftPlus Premium, download this plugin. Save it to your computer.
N.B. If you want some assurances before you download, check out the page for updraftplus.com at Google Safe Browsing.
If you’re an Apple Mac user, watch out for your Mac automatically unpacking the zip file. This is not desirable with WordPress plugins. To prevent this, go into Safari’s “Preferences” and un-check the option “Open safe files after downloading”.
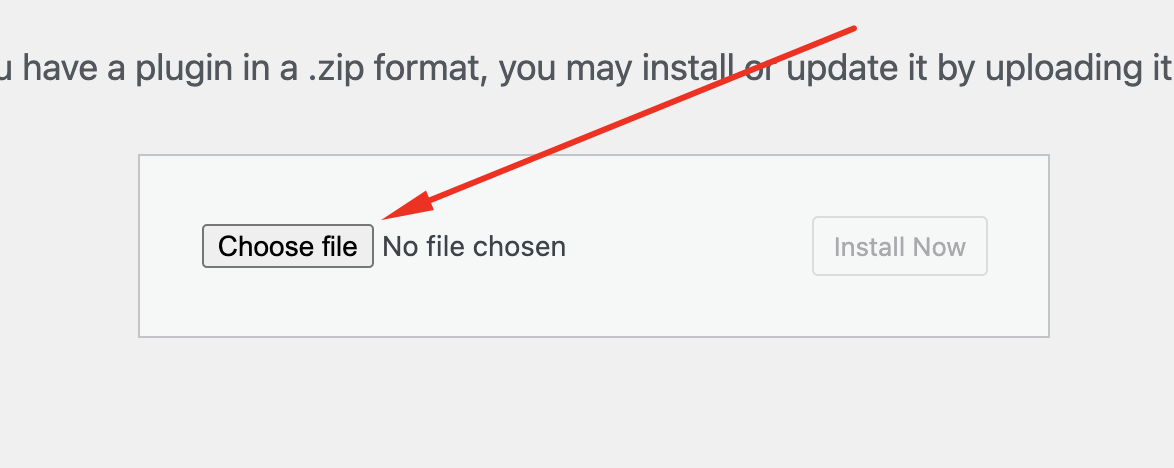
3. Upload the plugin in WordPress
- Click ‘Plugins’, ‘Add New’ then ‘Choose file’.
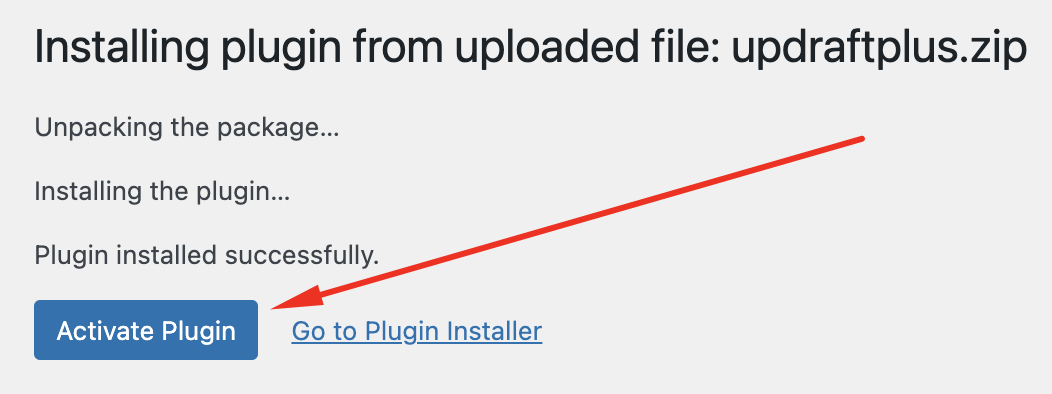
- Click ‘Activate Plugin’.

N.B. If your web hosting is configured with a small maximum upload limit, WordPress may say that the plugin is too big.
If this happens you can first install the ‘Upload larger plugins‘ from the WordPress directory, which extends WordPress’s plugin uploader with the ability to handle files above the configured PHP upload limit.
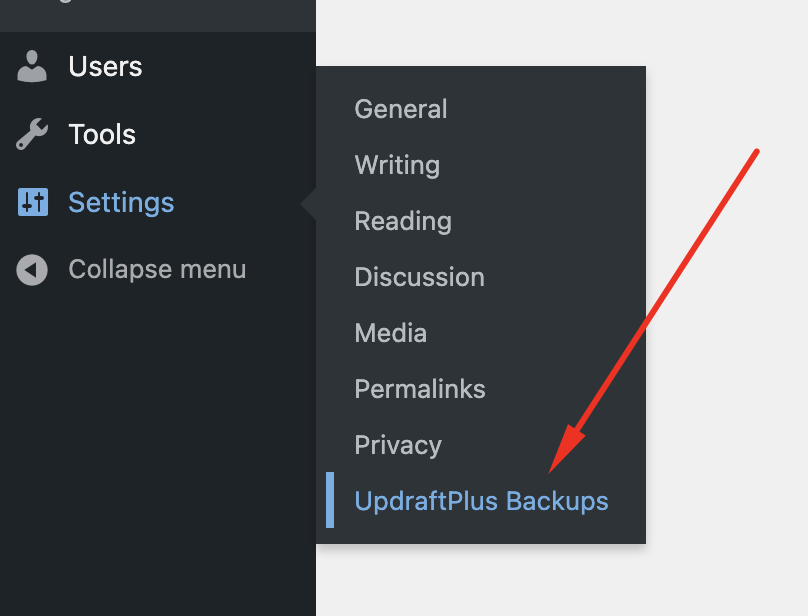
4. Open UpdraftPlus in WordPress
- Go to ‘Settings’ in the WordPress menu then ‘UpdraftPlus Backups’.
5. Login and activate premium features
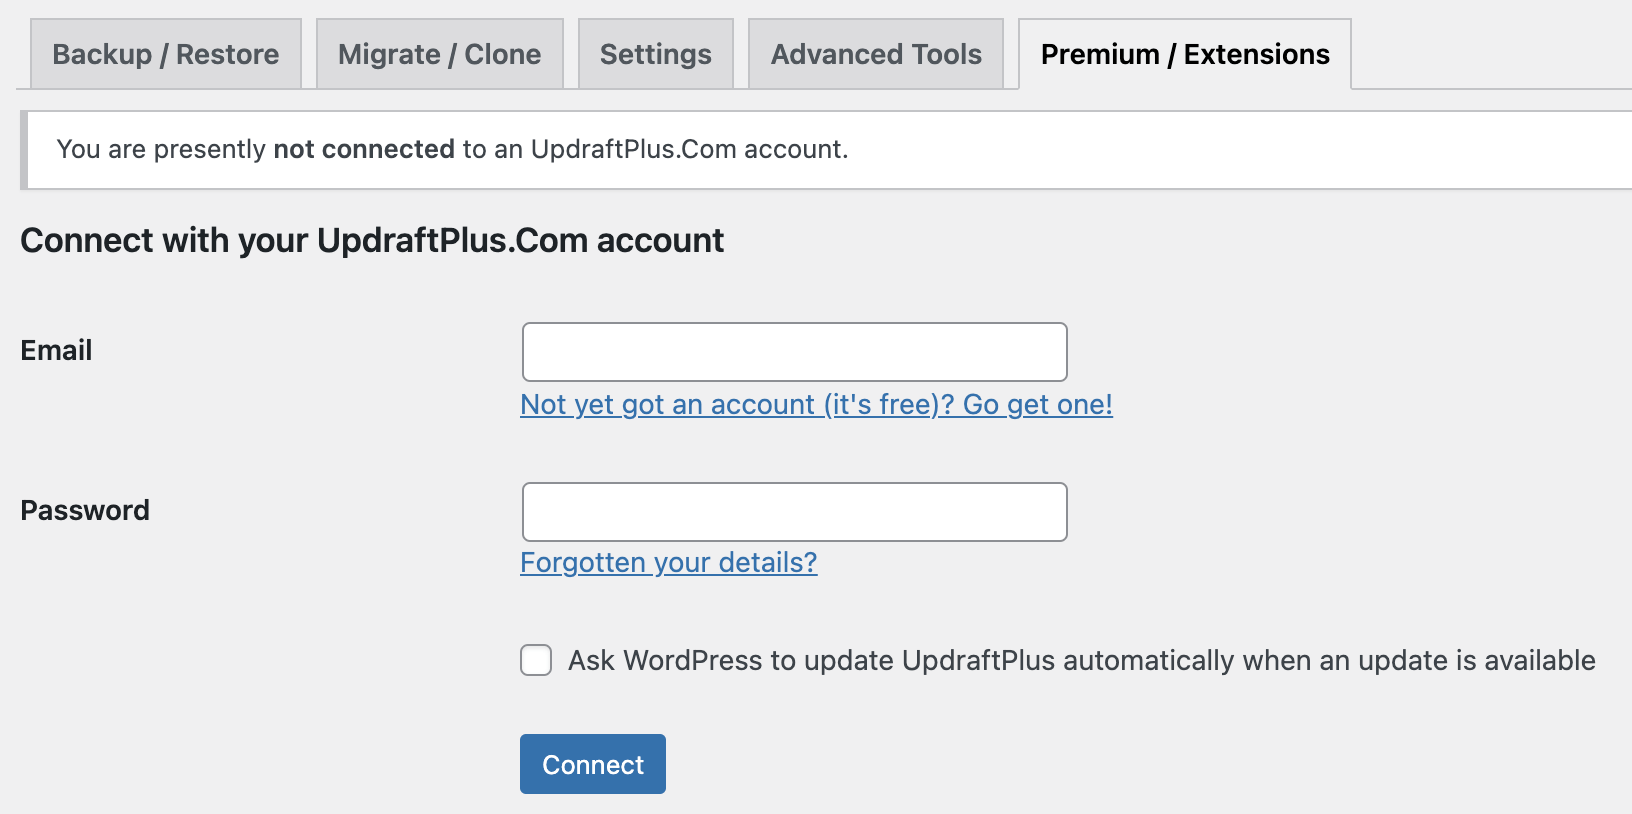
- Click into the ‘Premium / Extensions’ tab of the UpdraftPlus plugin.
- Login using the UpdraftPlus account details you purchased with (if you’re already logged in, click the link to refresh the connection instead).
- Scroll to find your purchase then click ‘activate it on this site’

Need help?
Premium customers can get support via email. Just log a support query via our customer support form. Our team of experienced developers will email you back. More than 90% of tickets are responded to within 24 hours!