This step-by-step guide shows you how to migrate your WordPress website with both the free and premium versions of UpdraftPlus, starting with the free version. Click to jump to ‘How to migrate your site with UpdraftPlus Premium‘
How to migrate your site with free UpdraftPlus
In this tutorial we refer to your ‘source site’ and your ‘destination site’. The source site is the site you would like to copy / migrate. The destination site is the site you’re migrating to.
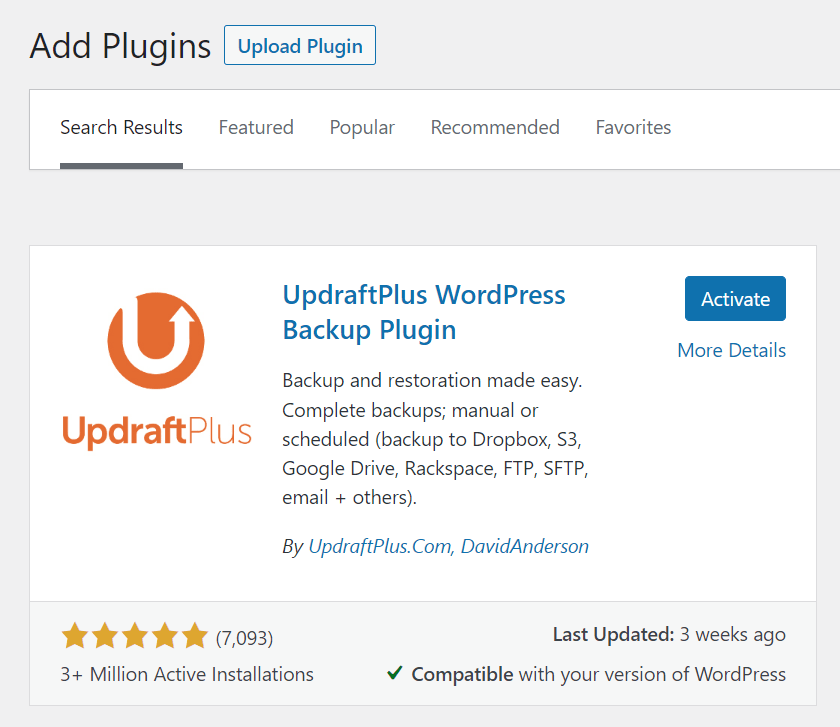
1. Install and activate UpdraftPlus on both the source site and destination site
- Click into the ‘Plugins’ menu in WordPress to install.
- Select ‘Add New’ and search for UpdraftPlus.
- After installing, click ‘Activate’ to complete the process.
- UpdraftPlus is located under ‘Settings’ on the left hand side of the WordPress menu.
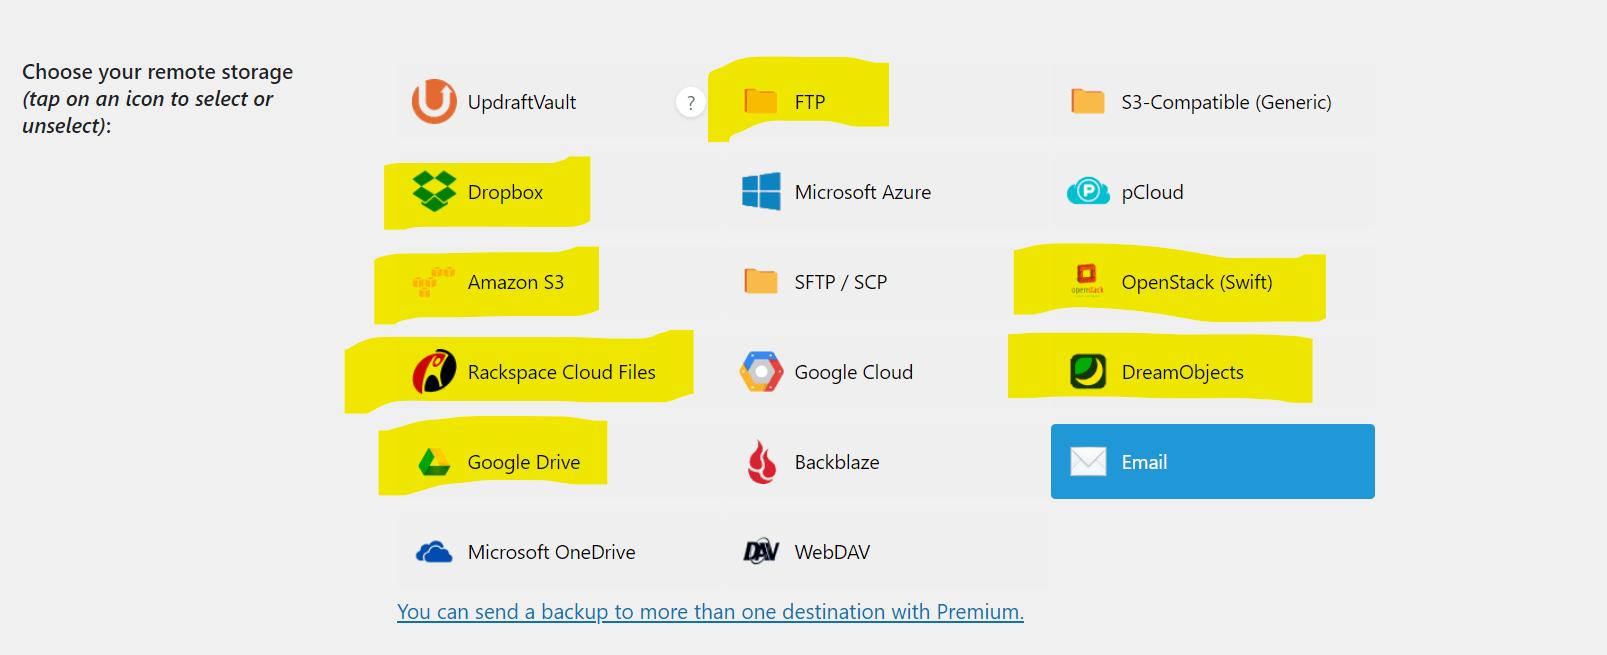
2. Choose a remote storage location in the source site
- Click the ‘Settings’ tab in UpdraftPlus.
- Select from the remote storage locations shown.
- Selecting an option takes you through a user journey that connects UpdraftPlus to the remote storage location.
Note, only the locations highlighted in the screenshot below are available in free UpdraftPlus i.e Dropbox, Amazon S3, Rackspace, Google Drive, FTP, OpenStack, DreamObjects and email. To backup to the other cloud storage options, upgrade to UpdraftPlus Premium.
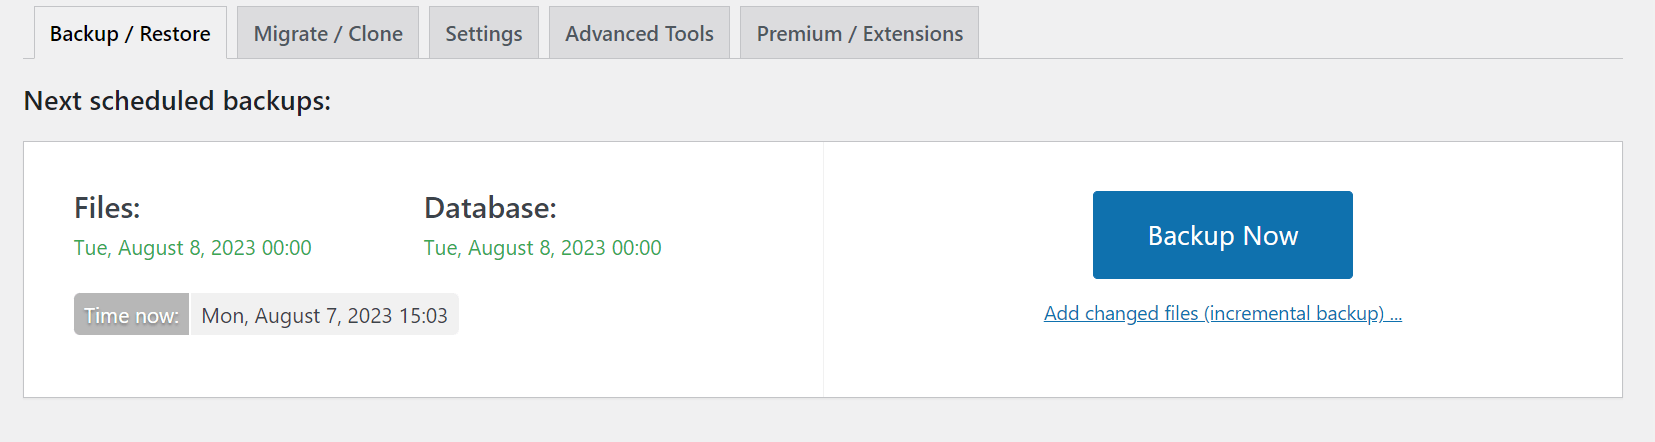
3. Take the backup
- Click the ‘Backup/Restore’ tab.
- Click ‘Backup Now’. A progress bar will be displayed, indicating the backup’s progress.
- The script will indicate which section of your site is currently being backed up.
4. Open the destination site
- Make sure you’ve installed and activated the UpdraftPlus plugin as you did before.
- Select the same remote storage location as you did before.
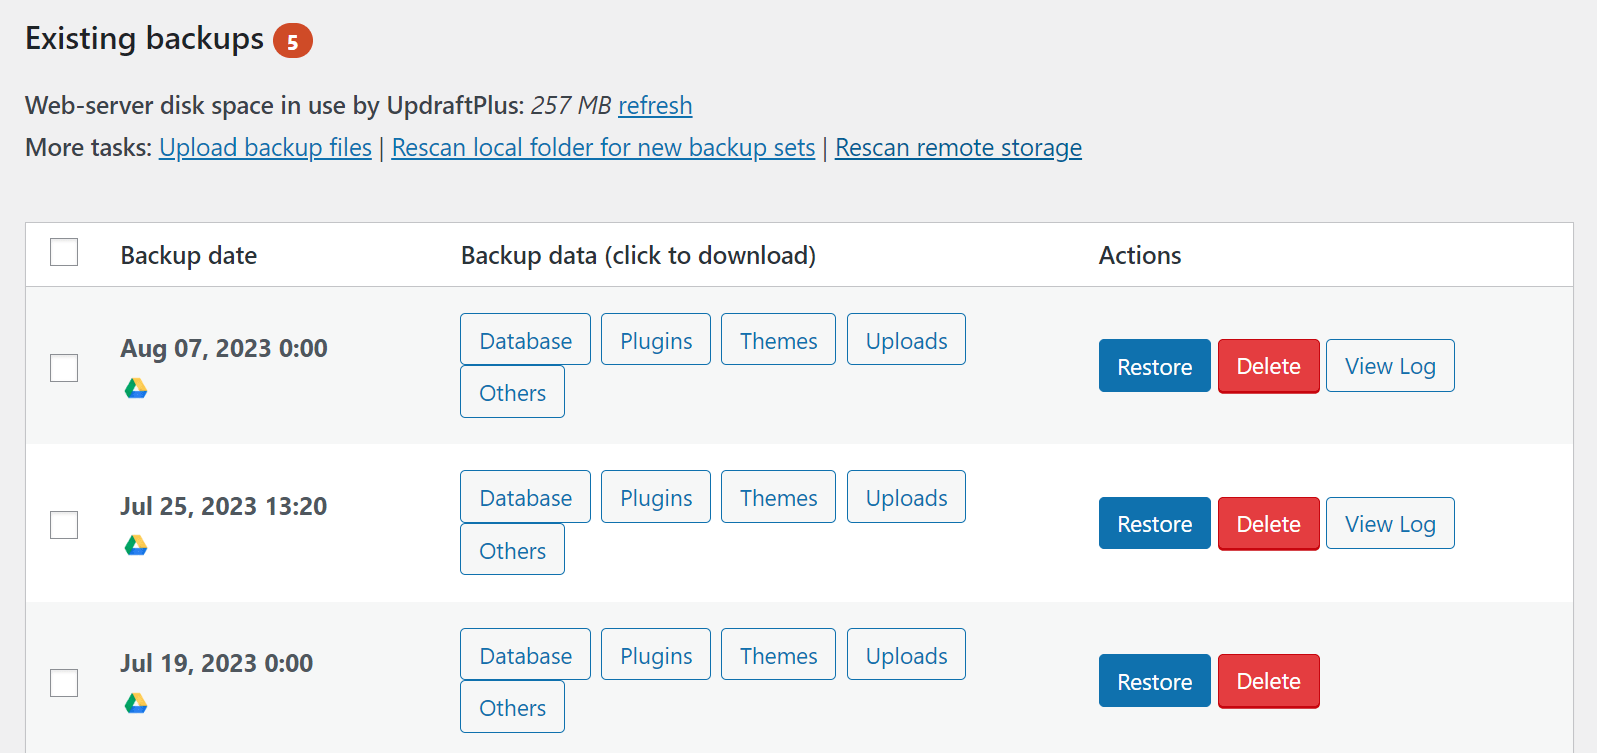
5. Restore the backup to complete the WordPress migration
- Scroll to the bottom of the ‘Backup / Restore’ tab.
- You should see a section called ‘Existing backups’.
- With both sites connected to the same remote storage location, you should see the backup that you made of the source site, in the destination site.
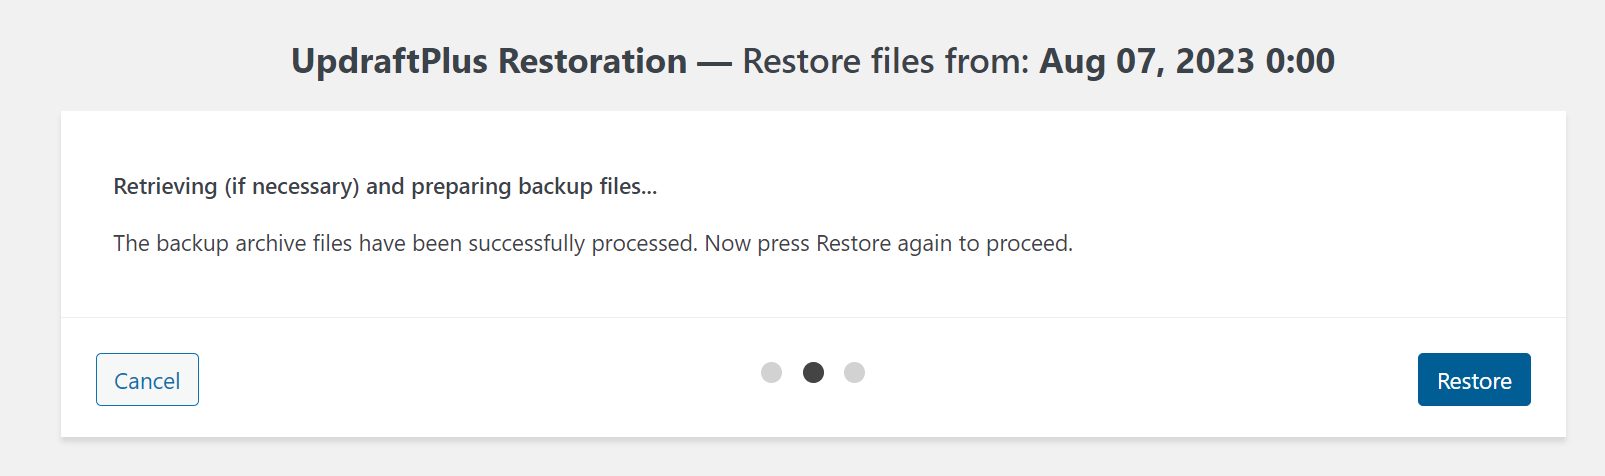
- Press the ‘Restore’ button next to it.
If your backup isn’t listed, click ‘Rescan remote storage’ under ‘More tasks’. Note this will display all backups from all sites connected to the remote storage location.
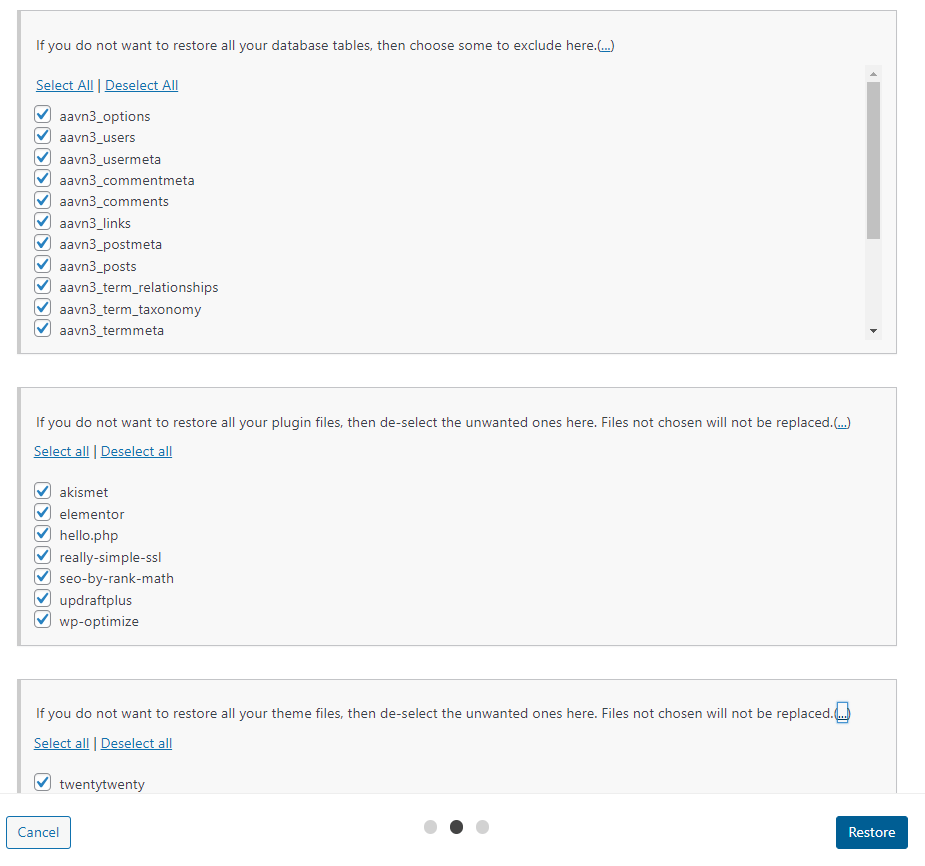
6. This will launch the wizard to guide you through the rest of the migration process
- Simply tick the relevant boxes to tell UpdraftPlus what to restore e.g. plugins, themes, uploads etc.
- Click ‘Next’, then ‘Restore’ and your restoration / migration is complete.
Remember, because your source site’s database has been migrated, the sign-in credentials for your destination site will no longer work and you’ll need to use the ones from your source site to login.

While the free version of UpdraftPlus can simplify the process of migrating your website to a new domain, it’s important to acknowledge that migration is a tricky process. In some cases, a little technical expertise may be required to address any issues that may arise.
Getting help
Note, Our team can offer more support with UpdraftPlus Premium than is allowed via free support in the WordPress support forums. We can do things like take a copy of your site (minus the user data) to replicate any errors you may be experiencing or access your server configuration.
How to migrate your site with UpdraftPlus Premium
Unlike the free version, UpdraftPlus Premium allows users to fully customise every aspect of their migration, down to which plugins and themes are carried across. Another advantage is you only need to connect two sites once to then make multiple migrations in just a few clicks.
In this tutorial we continue to refer to the ‘source site’ and ‘destination site’. The source site is the site you would like to copy / migrate. The destination site is the site you’re migrating to.
1. Purchase and install UpdraftPlus Premium on the source site and destination site
- Purchase UpdraftPlus Premium. You’ll then see a link to download the plugin which you’ll also receive via email.
- Click into the ‘Plugins’ menu in WordPress to install.
- Select ‘Add New’ then ‘Upload Plugin’ .
- After installing, click ‘Activate’ to complete the process.
- UpdraftPlus is located under ‘Settings’ on the left hand side of the WordPress menu.
Note if you already have free UpdraftPlus, you’ll need to deactivate and delete before installing Premium. See here for full installation instructions.
2. Go to the ‘Migrate / Clone’ tab
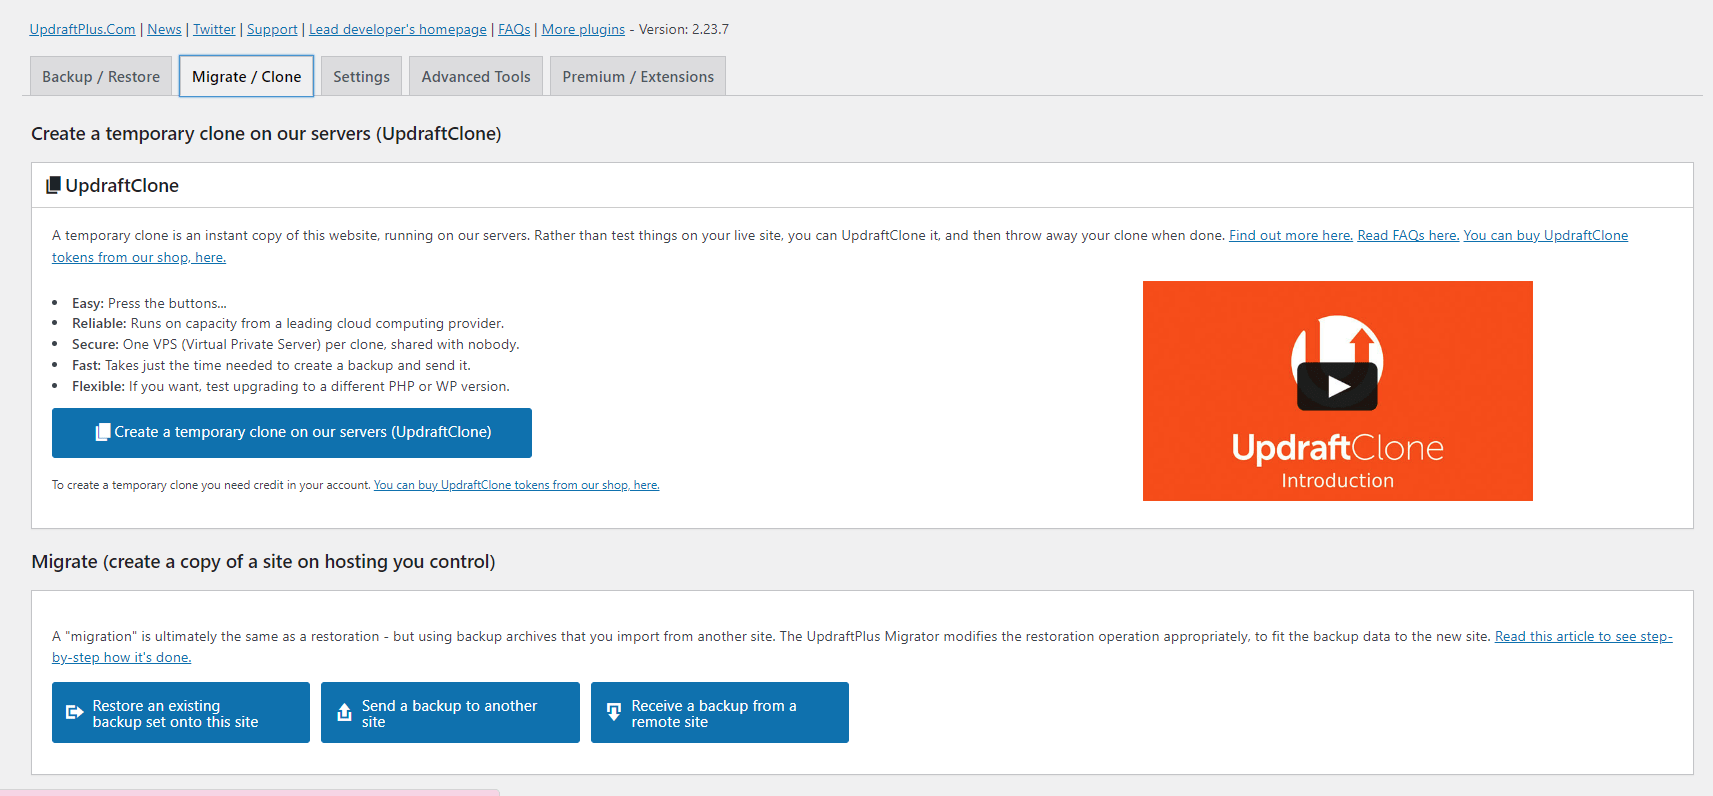
- Scroll to the ‘Migrate’ section at the bottom of the page.
- Click the third blue box ‘Receive a backup from a remote site’.
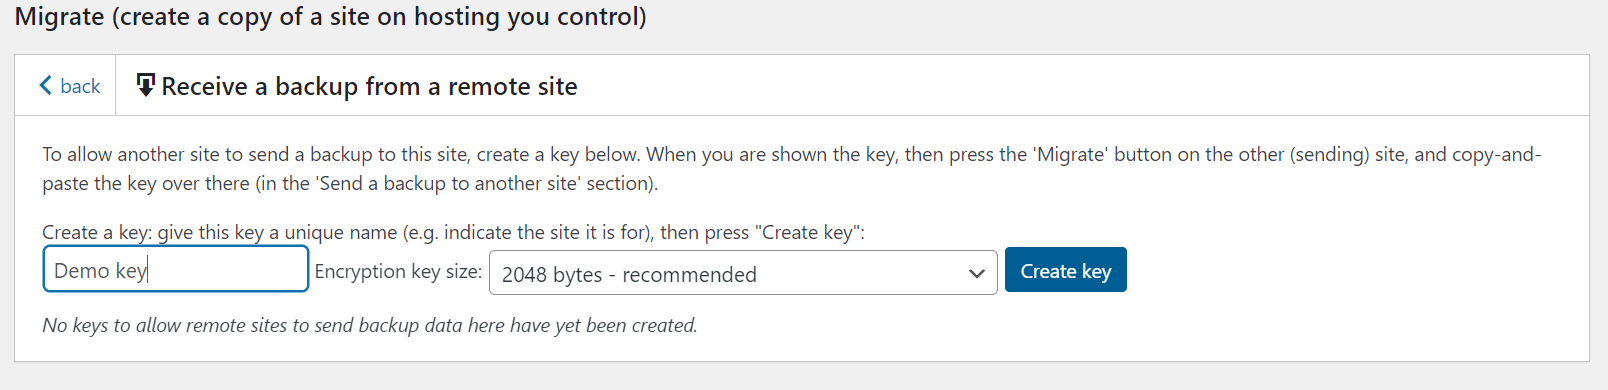
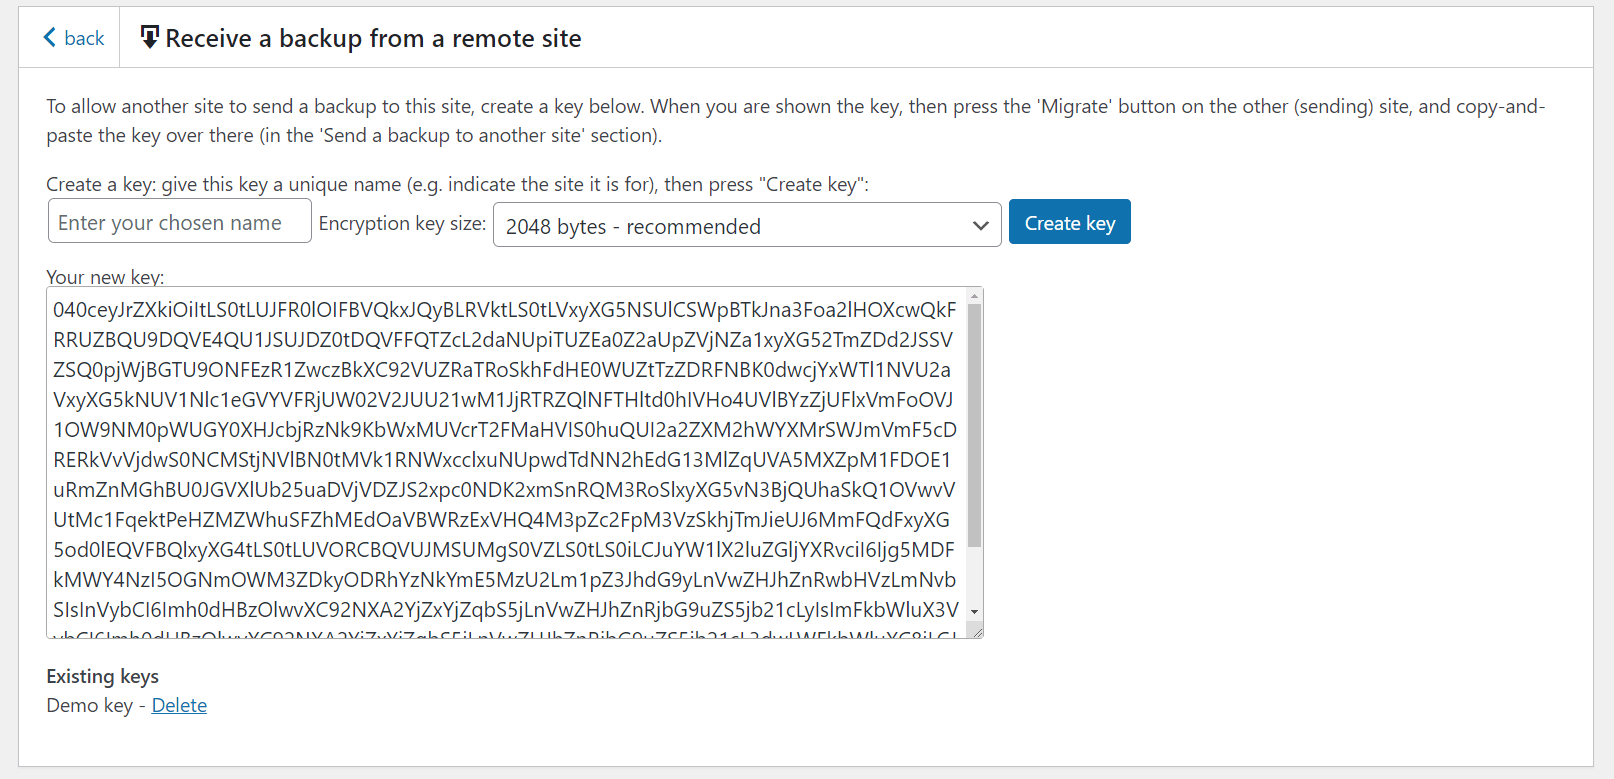
3. Create a key
- Enter a key name to identify the migration. It helps to have a clear and concise key name to keep track of which migration the key belongs to.
- Click ‘Create a key’.
- Select (ctrl + A) and copy (ctrl + X) the generated key.
Save it in a secure location. Once you leave this page you won’t be able to see the key again.
4. Open UpdraftPlus Premium on the source site and navigate again to the ‘Migrate / Clone’ tab
- Scroll to the bottom of the page and this time select ‘Send a backup to another site’.
- Next to ‘Site key’ paste in the key you copied from the new WordPress instance and press ‘Add site’.
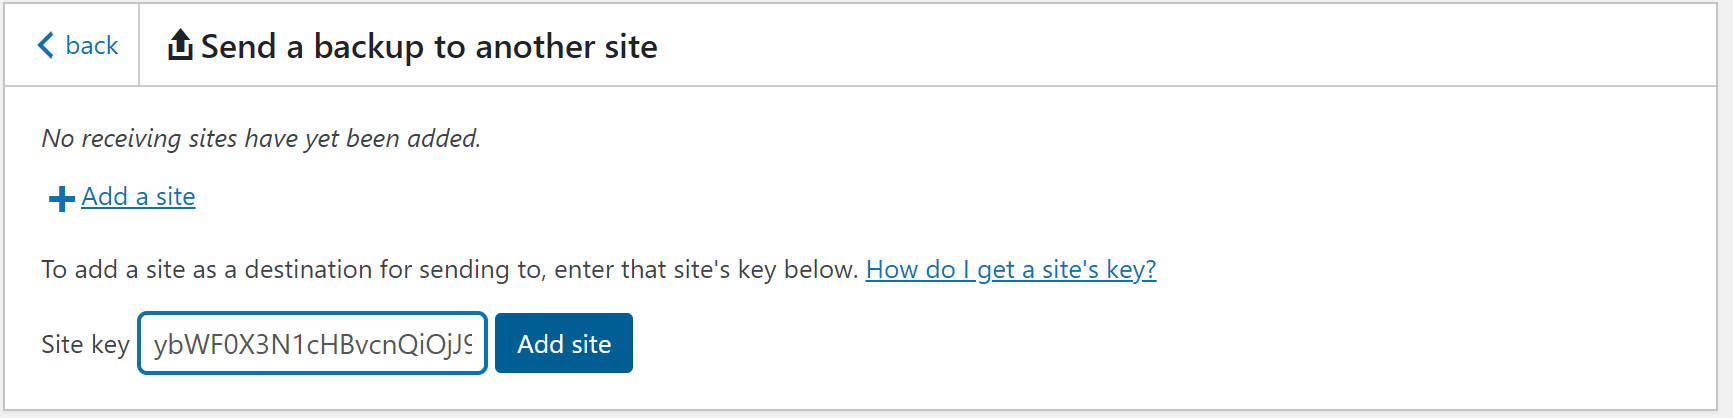
- Your site should now appear as an option in the dropdown menu next to the words ‘Send to site’.
- Click ‘Send’ to begin the automatic process of migrating your WordPress site to the destination site.

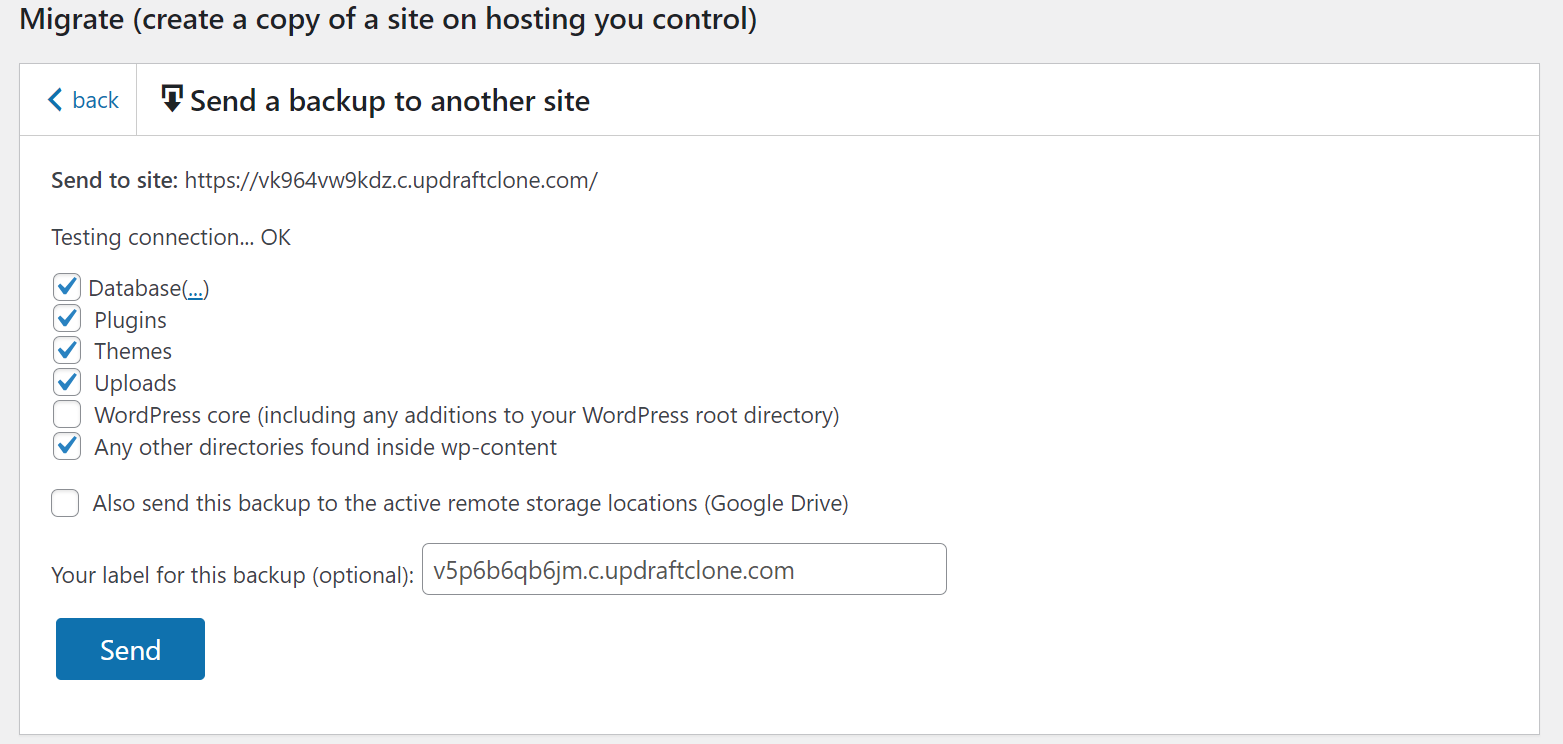
5. Configure your WordPress migration
- Select which aspects of your site to migrate.
Generally, it is recommended to check all the boxes for a complete migration, but there may be cases where it’s unnecessary or undesired. For instance, if you have an existing production database for the new site and do not want to overwrite it with data from the old site.
- When you’re ready, click ‘Send’.
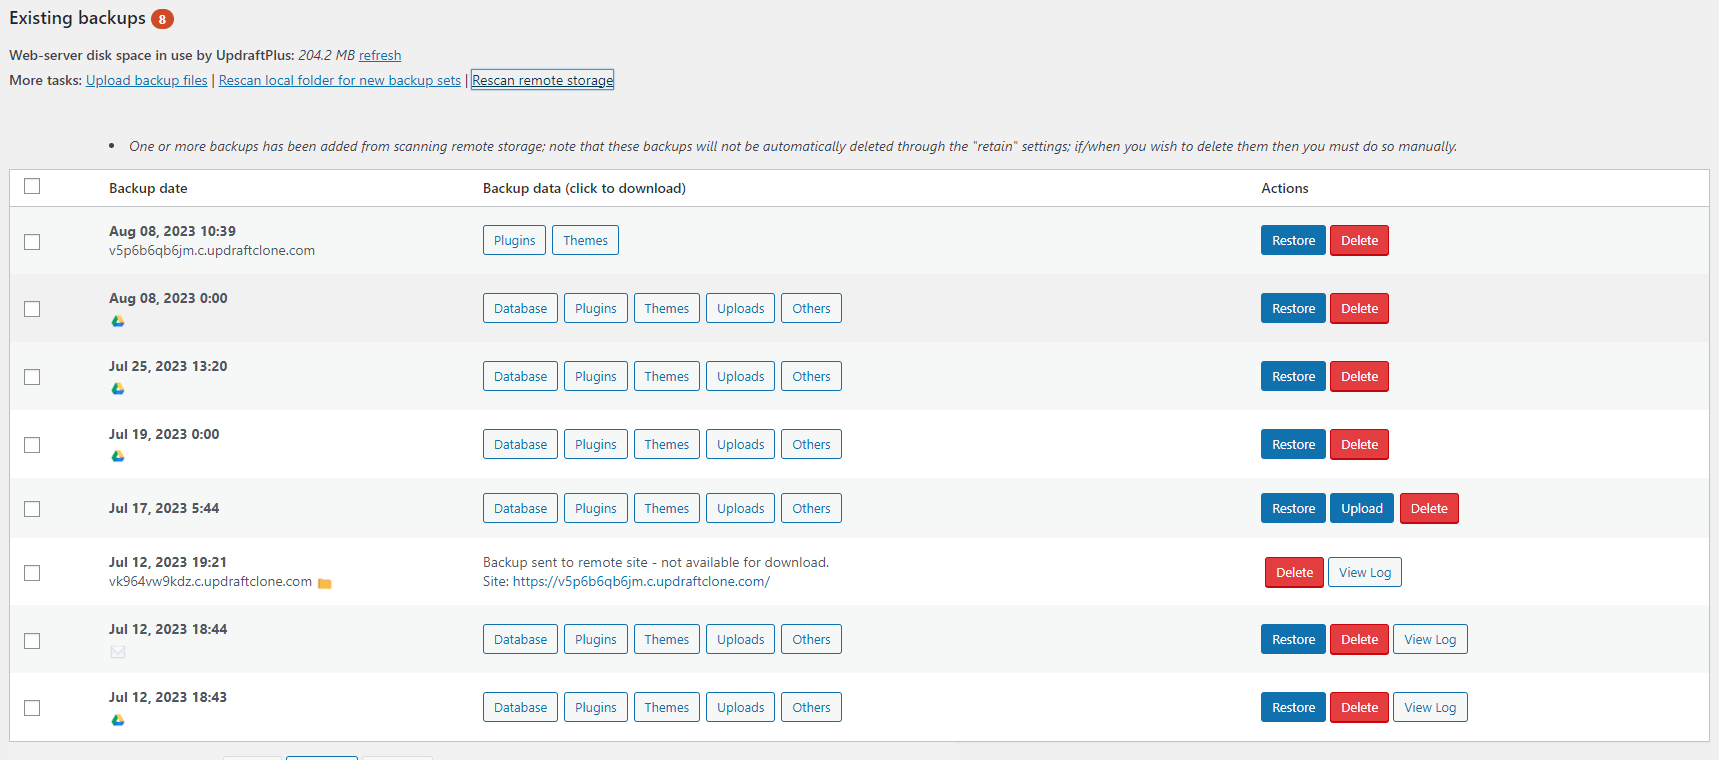
6. Jump back into the destination site to restore the sent backup
- The last step is to ‘restore’ the migrated backup onto the destination site.
- Log into the destination site and navigate to the ‘Backup / Restore’ tab.
- In the ‘Existing backups’ section at the bottom of the page, you should find an entry related to the migrated backup. Click on the ‘restore’ option.
7. Customise your migration
- Choose whether you want to restore plugins, themes, uploads, databases and/or other types of files to migrate and select ‘Next’.
- Choose which plugins, themes etc. to restore on the next screen.
- Ensure the ‘Search and replace site location in the database’ option is checked.
It is important to check this option as WordPress stores site URLs and page links in the database. Failure to run the search and replace could result in broken links or links pointing back to the old domain.
- When you’re ready, click ‘Restore’.
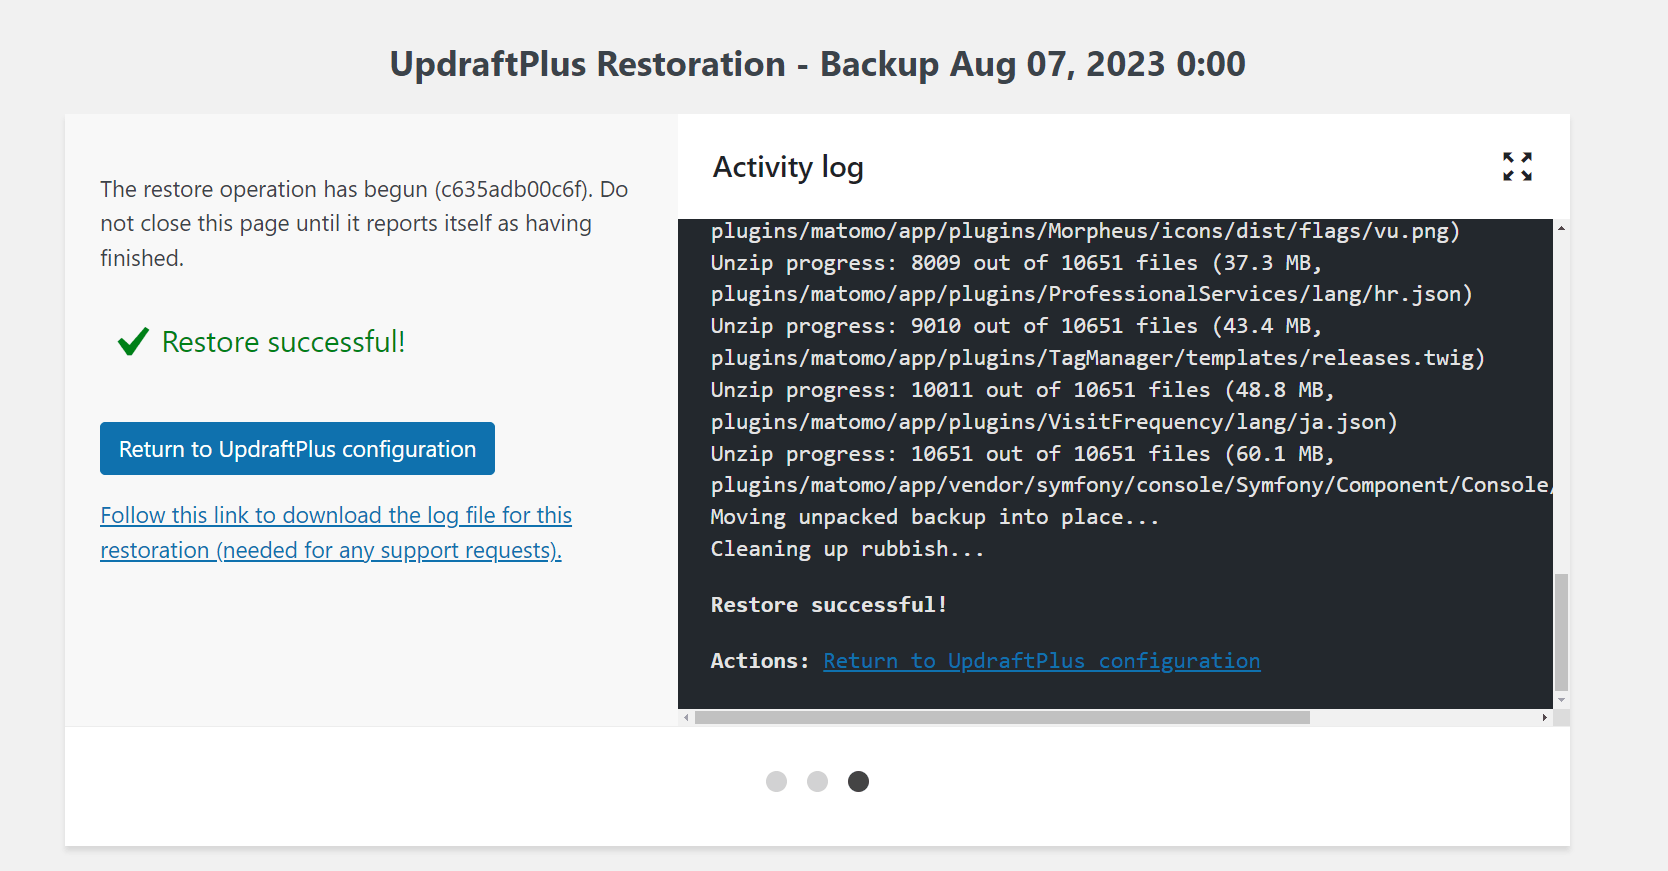
8. Migration successful
If all goes as expected, you should see a screen similar to this one.
Depending on what you chose to migrate, your sign-in credentials for the new site will now have changed to be the same as the source site.
UpdraftPlus Premium makes a WordPress site migration the work of a few mouse clicks. If you encounter any issues, our friendly support team will be happy to help. 94% of support tickets are responded to in 24 hours.
Posted in: Migration
![]()
![]()
![]()