Managing multiple WordPress websites can be challenging. It involves logging onto each dashboard separately, handle all the updates, manage comments and then carry out the operations. Faced with the same situation, our CEO David Anderson decided to do something about it and created UpdraftCentral as part of the UpdraftPlus plugin.
UpdraftCentral is a SaaS (Software as a Service) dashboard programme designed to manage multiple sites from one central location. Below are some of the major features –
- Backup all your sites from one central location to the Cloud
- Manage and update all themes, plugins and WordPress core
- Automated backup schedule
- Manage users
- Manage comments
You can even try it for free! Yes, you heard that right! You can now manage up to 5 sites – free of charge on UpdraftCentral.
Once you have created an account, you can access your dashboard at https://updraftplus.com/my-account/updraftcentral-remote-control/
Adding a site to UpdraftCentral
Adding a site to your UpdraftCentral dashboard is quite simple. All you need to do is install the UpdraftPlus free or UpdraftPlus Premium plugin on your WordPress site. The premium version of UpdraftPlus comes with several handy features that are not available with the free version. If you would like to read more about the comparison between both the free and premium versions, please click here.
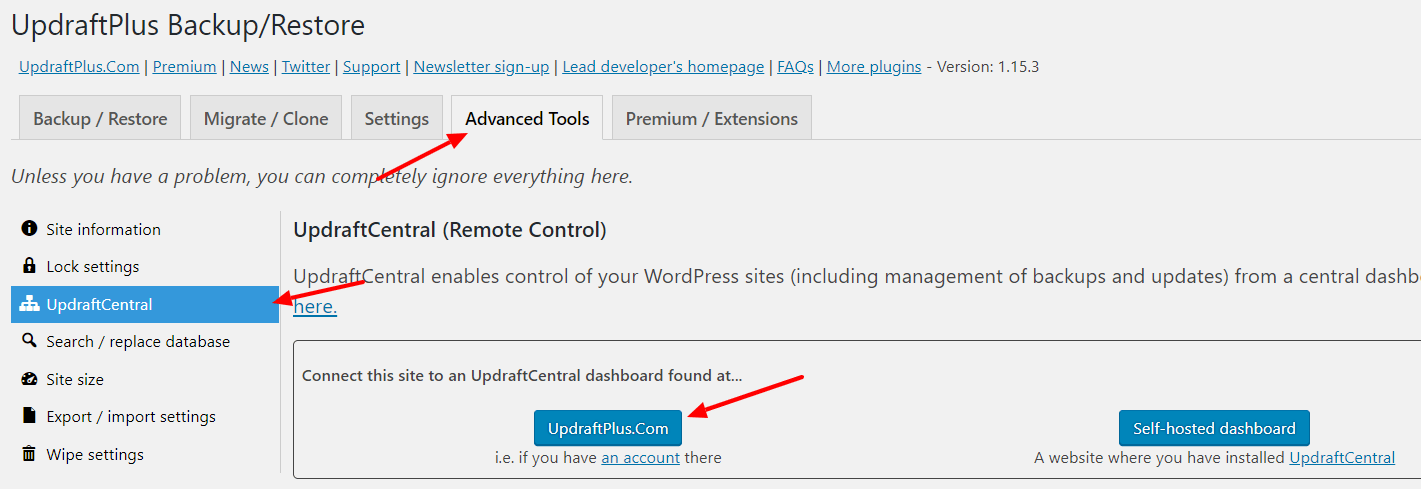
After you have installed and activated UpdraftPlus on your site, create an encrypted key that acts as the site identity on UpdraftCentral. Go to the ‘Advanced Tools’ tab of UpdraftPlus setting page. On the left side, you see ‘UpdraftCentral’ – Click on it. You now see a section heading – “Connect this site to an….”.
Inside you get a button ‘Updraftplus.com’ – click on it.
Next you will see a dropdown for ‘Encryption key size.’ Keep the default value as it is and click on the ‘Create’ button.
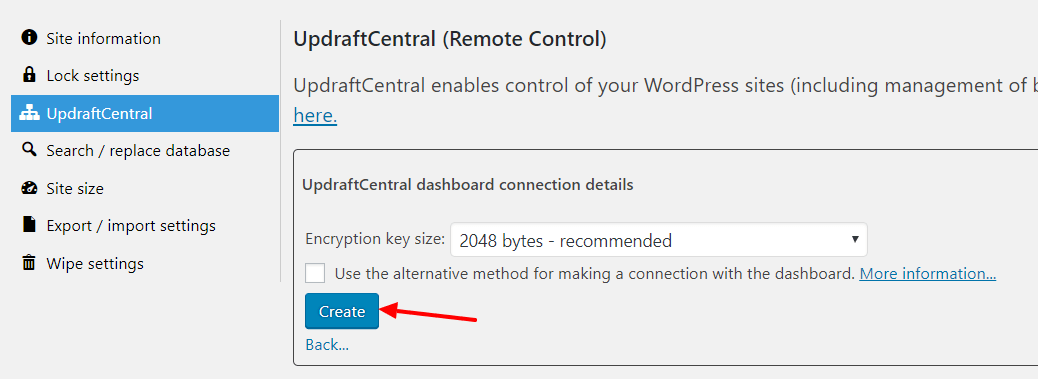
UpdraftPlus creates an encrypted key for UpdraftCentral.
Now head over to your UpdraftCentral dashboard at https://updraftplus.com/my-account/updraftcentral-remote-control/.
Go to ‘Sites’ and click on the ‘+’ icon in the top-right corner.
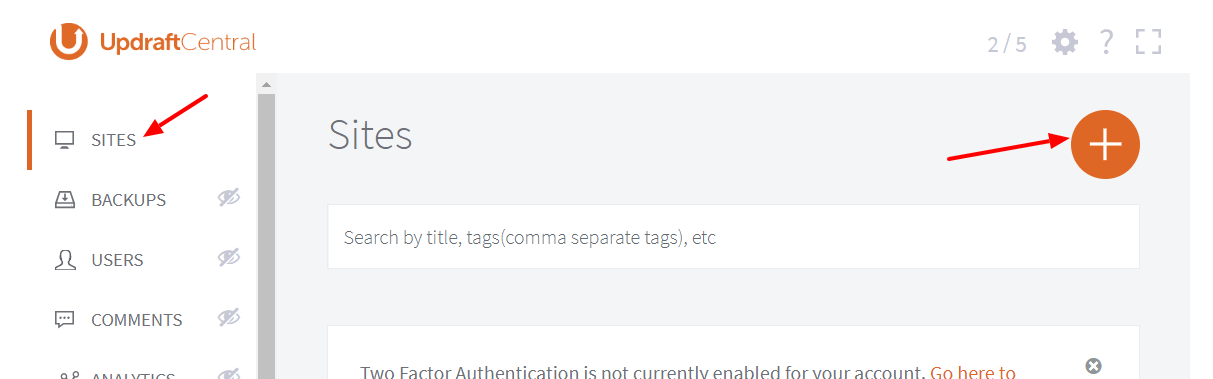
This opens a pop-up where you can paste your key. Once you have added the key, you will see your site listed under UpdraftCentral. Repeat the same process for any other sites you may want to add to UpdraftCentral.
How to Approve Comments Using UpdraftCentral
With UpdraftCentral, you can efficiently manage all of the comments from all of your sites from one central location. Posted comments automatically sync to the UpdraftCentral dashboard in the background. You can then carry out all the same operations that WordPress provides for comments such as – approve or disapprove comments, reply to comments, edit or trash the comment or mark as spam.
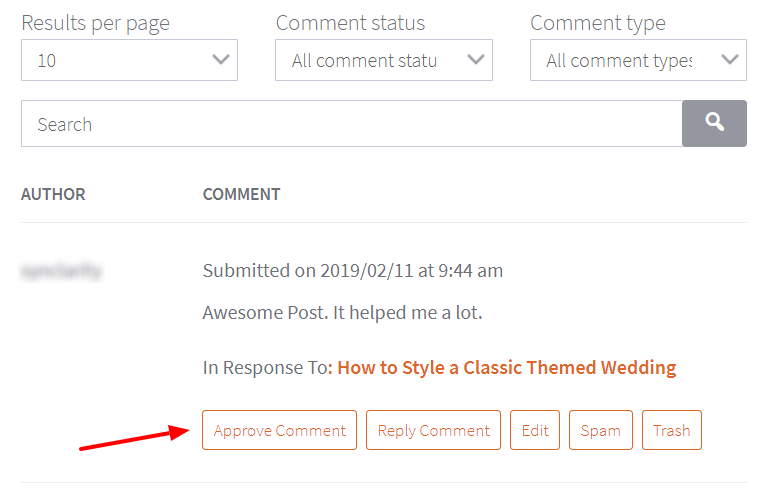
Let’s take a look at UpdraftCentral in action. First, go to the ‘Comments’ section of your UpdraftCentral dashboard.
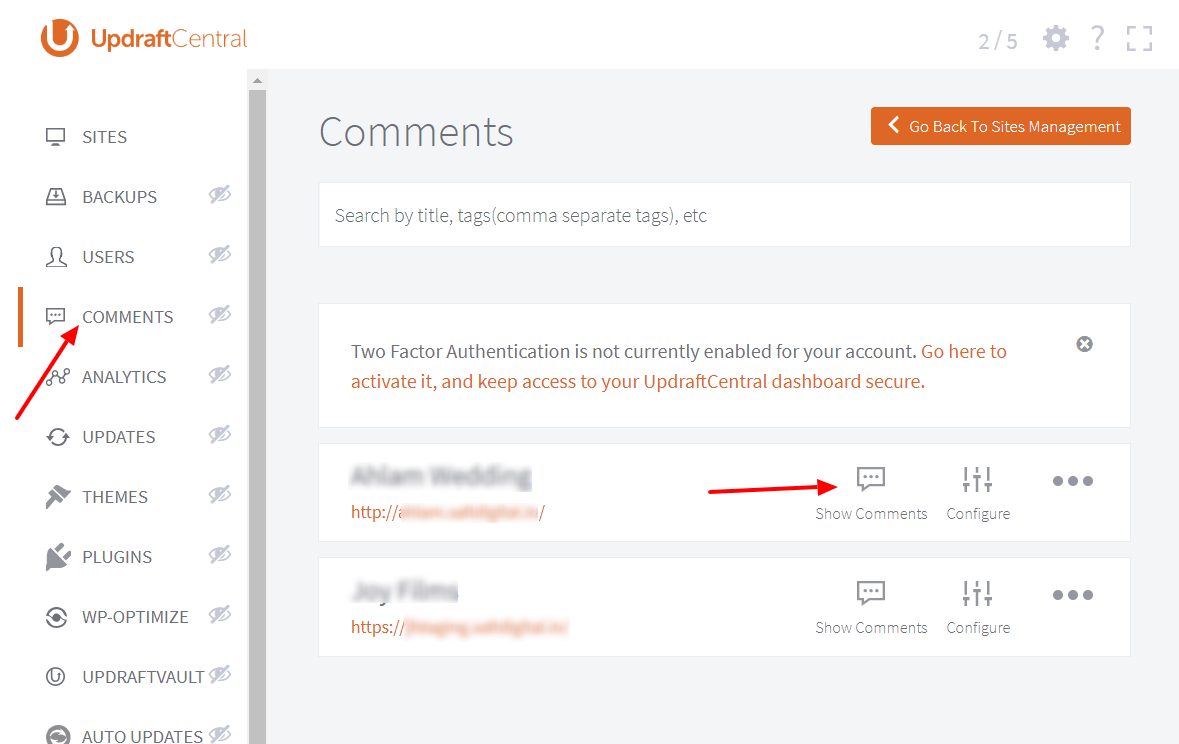
In this section, you get a list of all of your connected sites along with the options ‘Show Comments’ and ‘Configure.’ You can configure all of the comments settings by clicking on ‘Configure’ which opens a pop-up window from where you can choose the settings.
To approve comments click on ‘Show Comments,’ after which you get a list of all the comments your site has received. You can view details including comment author, comment date and comments article. To approve a comment, click the ‘Approve Comment’ button, which will automatically publishes the comment on your site.
You can then perform the same process and approve comments on your other UpdraftCentral connected sites from the dashboard.
Join UpdraftCentral for free and to start taking advantage of these amazing time-saving features.
You can also read more about how UpdraftCentral will now allow you to install a new plugin or theme on all your WordPress sites at one here and about David’s journey with UpdraftCentral in this exclusive interview.
Be sure to let us know any feedback comments you may have in the comment section below.
![]()
![]()
![]()