Duplicating a WordPress site is an incredibly useful and popular task for anyone that wants to make a copy in order to test out a new theme or update, or to use the site as the basis of an all new enterprise. Copying a site for these kinds of reasons can be an incredibly useful tool.
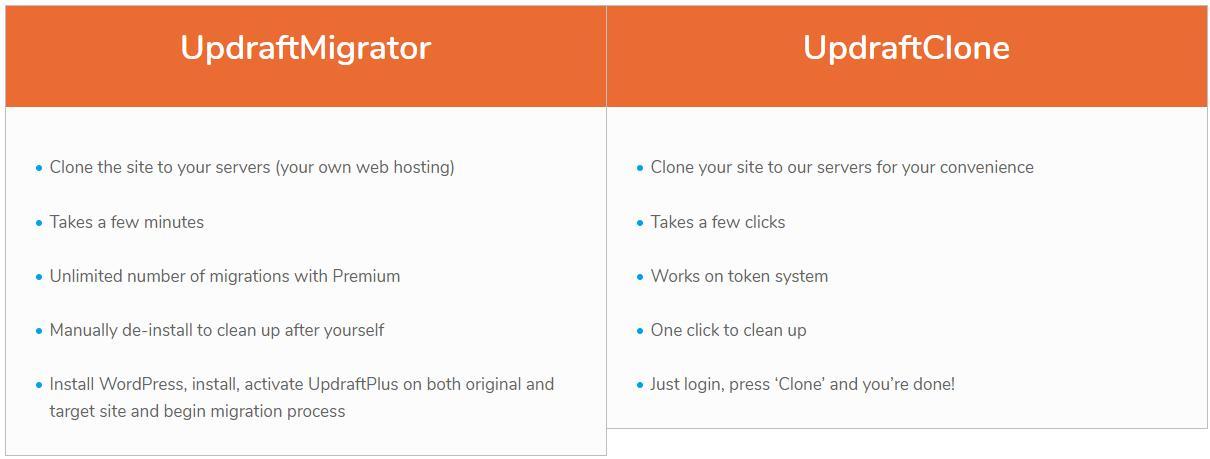
The first option users have is to use the Migrator feature which uses your own domain to create a cloned site. The second option is to use UpdraftClone, which creates an all new temporary site for you to clone to. Both can be used to achieve the same result, but both do so in different ways as Clone was designed to create a cloned site testing/development issues, while Migrator was designed for moving or copying a site to another permanent location. Below, we shall explain how to clone a WordPress site using both methods so users can better evaluate which option is right for them.
How to clone a site using Migrator
How to clone a site using UpdraftClone
Cloning a WordPress site using UpdraftMigrator
Install UpdraftPlus Premium or the stand-alone “Migrator” add-on (depending on which you bought) – instructions for that are here.
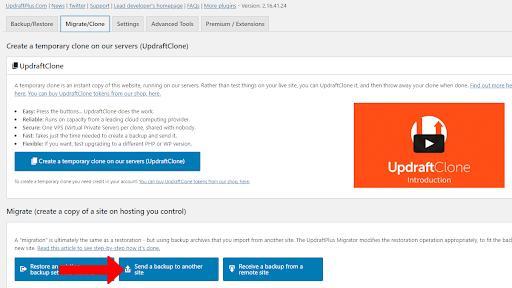
Once you have your blank destination site set up, to start the clone process, go to the Migrate/Clone tab in your UpdraftPlus plugin on your original site.
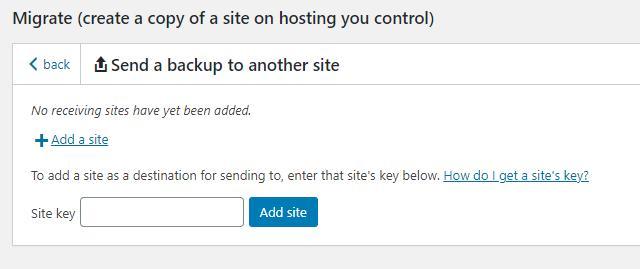
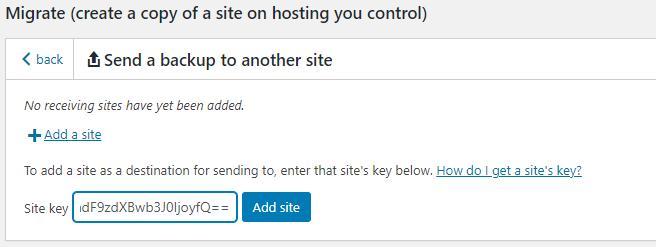
Next, press the “Send a backup to another site” button.
A box will now ask you to add a new site key in order to add a destination site to where you wish to send your clone.
To get this site key, go to the blank destination site you created. This site can be a brand new site with a unique website address that you own, or a temporary blank clone that you created using UpdraftClone that you wish to send the original site to. Whichever you choose, ensure that you have the same UpdraftPlus Premium package or Migrator add-on installed on the destination site as on your source site.
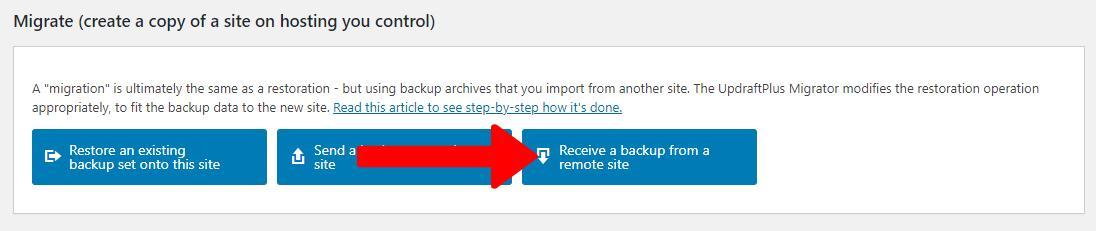
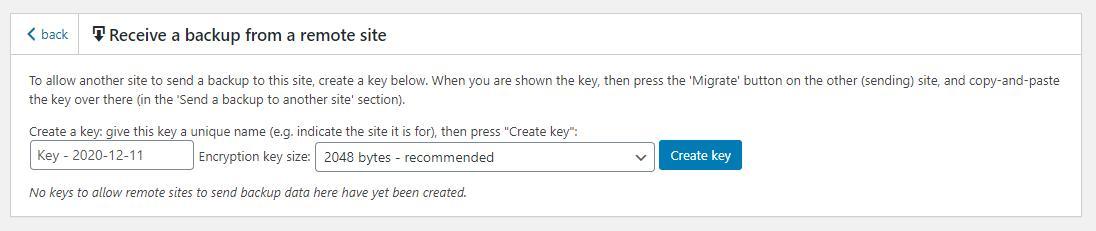
On the destination site, click on the Migrate/Clone tab and then select the “Receive a backup from a remote site” box.
This will bring up the following options. Here you can create a unique key name so that you can keep track of and identify the clone transfer. Once you have selected your name, press the “Create Key” button.
You will now be given a unique long key code that you need to highlight and copy.

In the “Site key” box of your source site, paste the key code that you just copied from your blank destination site and press the “Add site” button.
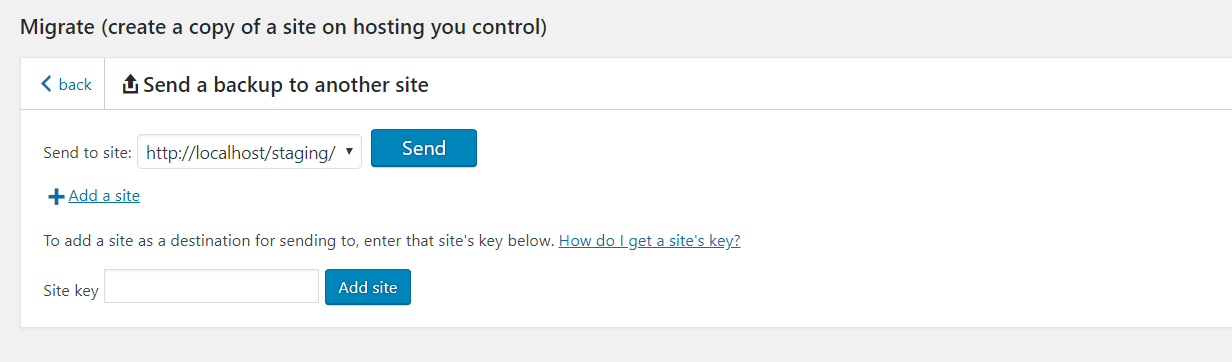
You should now see that your destination site has been added to a list of sites you can send a clone of your source site to. Select your destination site and press the “Send” button. Please be aware that this will write over anything you have in your destination site, so if there is anything you want to keep, be sure save it before you hit send.
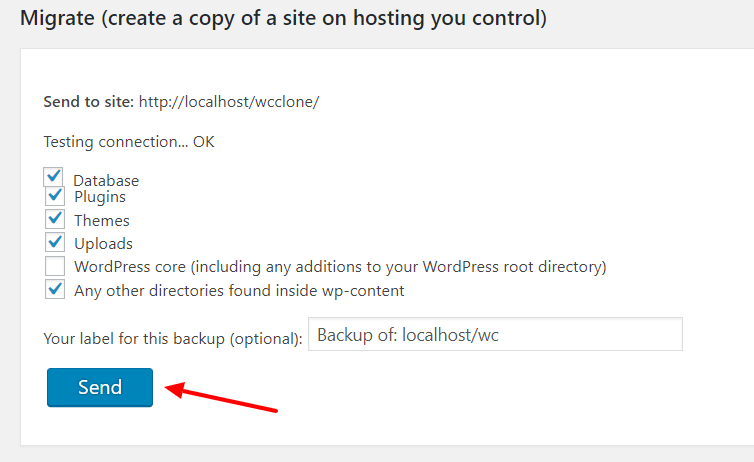
Select all the options you wish to clone, such as database, themes, plugins etc. Once you are ready to clone your site, press the send button.
In the Backup/Restore tab of your source site, you should now see that your original site is being cloned and sent to your destination site.
In your destination site, you should now have a backup file in the Backup/Restore tab of your UpdraftPlus plugin. Just click “Restore” to complete the final stage of the transfer of your source site to your destination site.

Tick the boxes of all the files you wish to transfer to your new site and click “Restore” again.
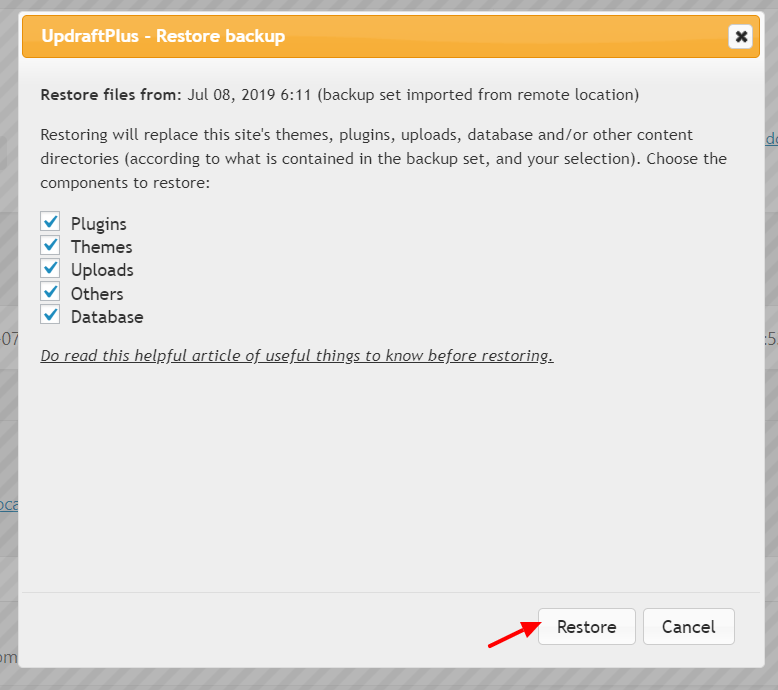
Finally, you will see a checkbox for database restoration options. Tick the checkbox to complete the process. As we are restoring the database of the source site, we need to update the URLs with the new site URLs.

Now just wait for Migrator to finish the process of migrating and cloning your original site. Once complete, log out of your destination site dashboard and log-in again. You should see now your site has cloned successfully.
That’s it! It’s really that simple to clone a website using Migrator.
Get Migrator by upgrading to UpdraftPlus Premium or by adding the Migrator feature today.
How to create a clone using UpdraftClone
The First UpdraftClone Method
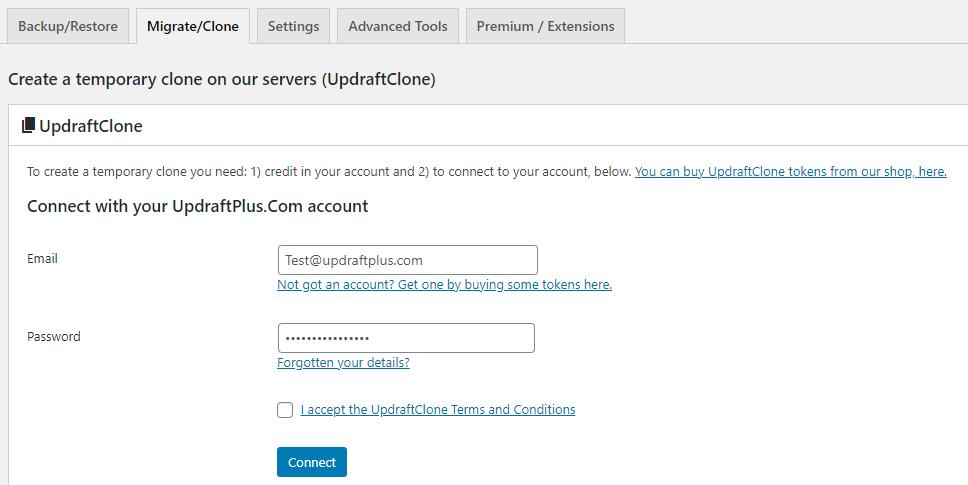
There are two quick and easy ways to create a clone of your site using UpdraftClone. The first is to go to the Migrate/Clone tab of the UpdraftPlus plugin in the site you wish to clone and log in to your UpdraftPlus account when prompted. Make sure you have UpdraftClone tokens in your account before you start.
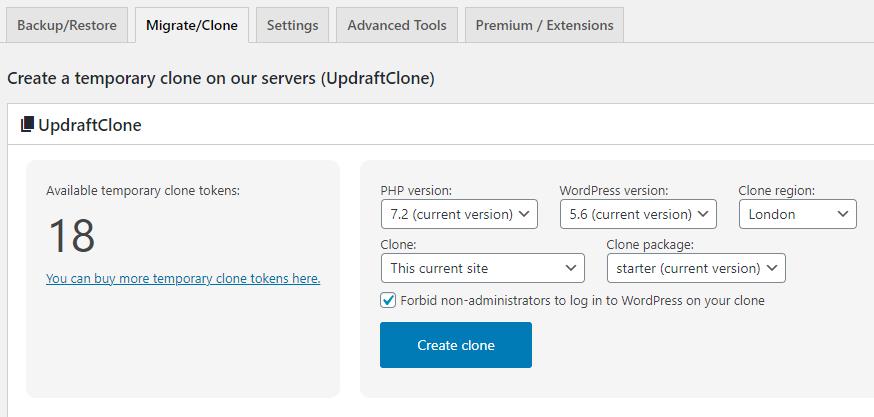
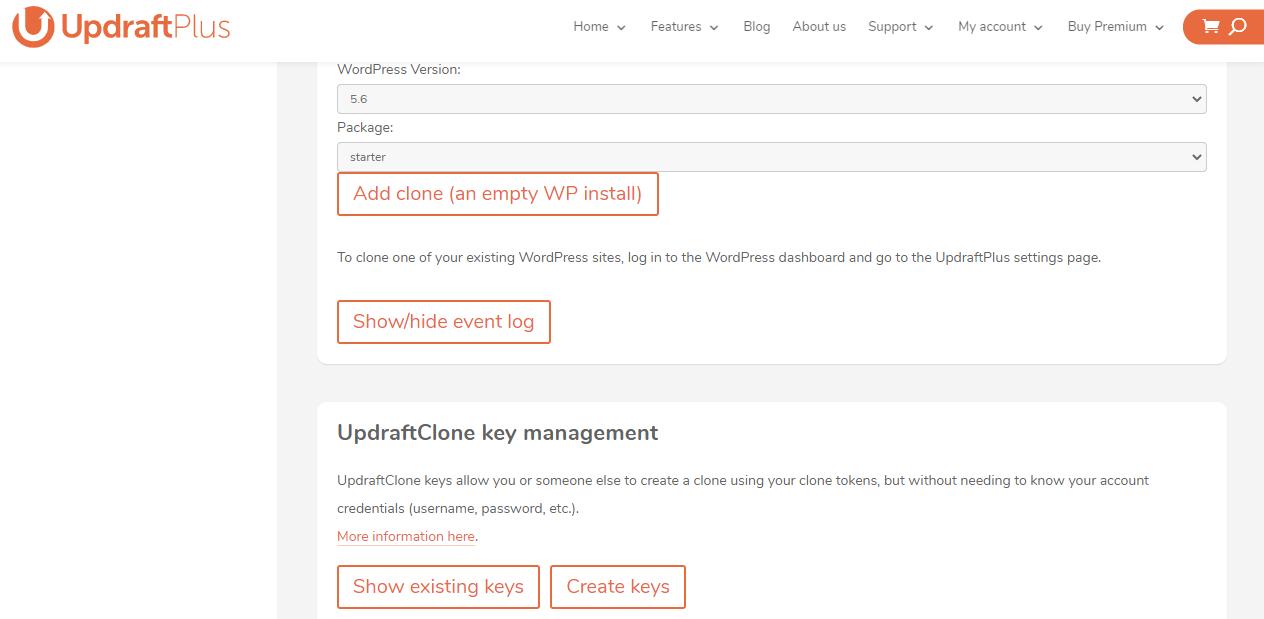
Once you are logged in, you can set the PHP, WordPress version, clone region and details of the cloned site you want to create. Once you have selected these, press the “Create clone” button.
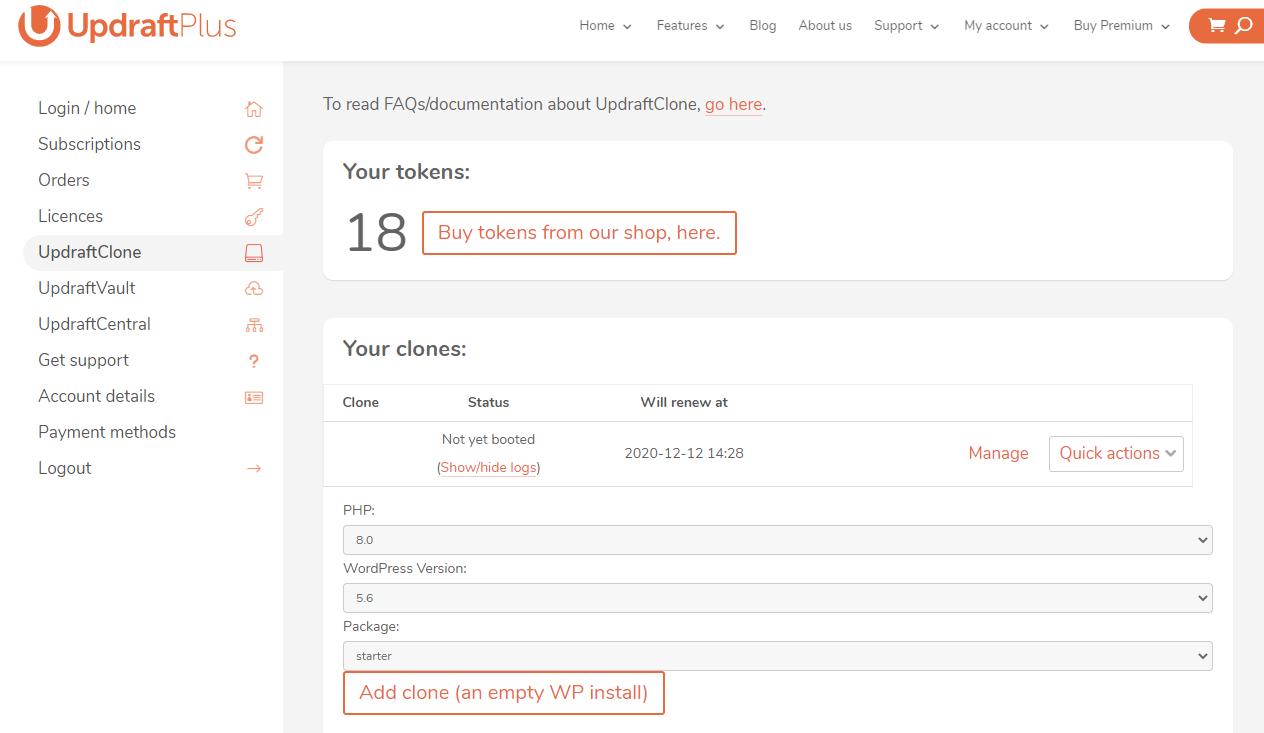
You will now get a message that your clone is being created. The new cloned site will be stored in the ‘UpdraftClone’ section of your UpdraftPlus website account. The login and password details will be the same as your source site.
The second UpdraftClone method
There is a second option to clone your site using an UpdraftClone key. This method is also easy and straightforward to do.
First, go to Updraftplus.com and log into your account. Next, go to My Account>My Clones (UpdraftClone) and check you have enough clone tokens to keep the cloned site active for as long as you will need it.
At the bottom of this page, you will see the options for “Show existing keys” and “Create keys”. If this is your first time creating a key to clone a site, press the “Create keys” button.
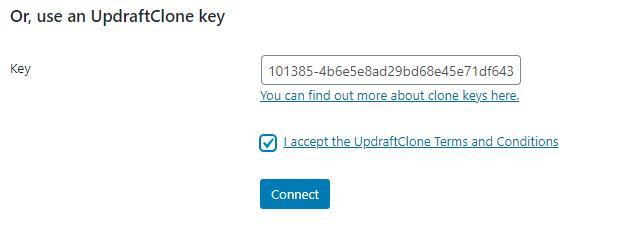
You will now be presented with a list of keys that you can use to clone a site. Copy one of the keys and return to the site you wish to clone.

Paste the key into the key box, tick “I accept the UpdraftClone Terms and Conditions” and then press “Connect”.
You will now be presented with the same clone setting options as the previous UpdraftClone method. As before, set the PHP, WordPress version, clone region and clone details of the site you wish to create a clone of. Once you have selected these, press the “Create clone” button.

Your clone is now being created.
The login and password details will be the same as your source site. You’re all done!